Setup Instructions
This page provides detailed instructions for setting up the Puffin pilot equipment and app.
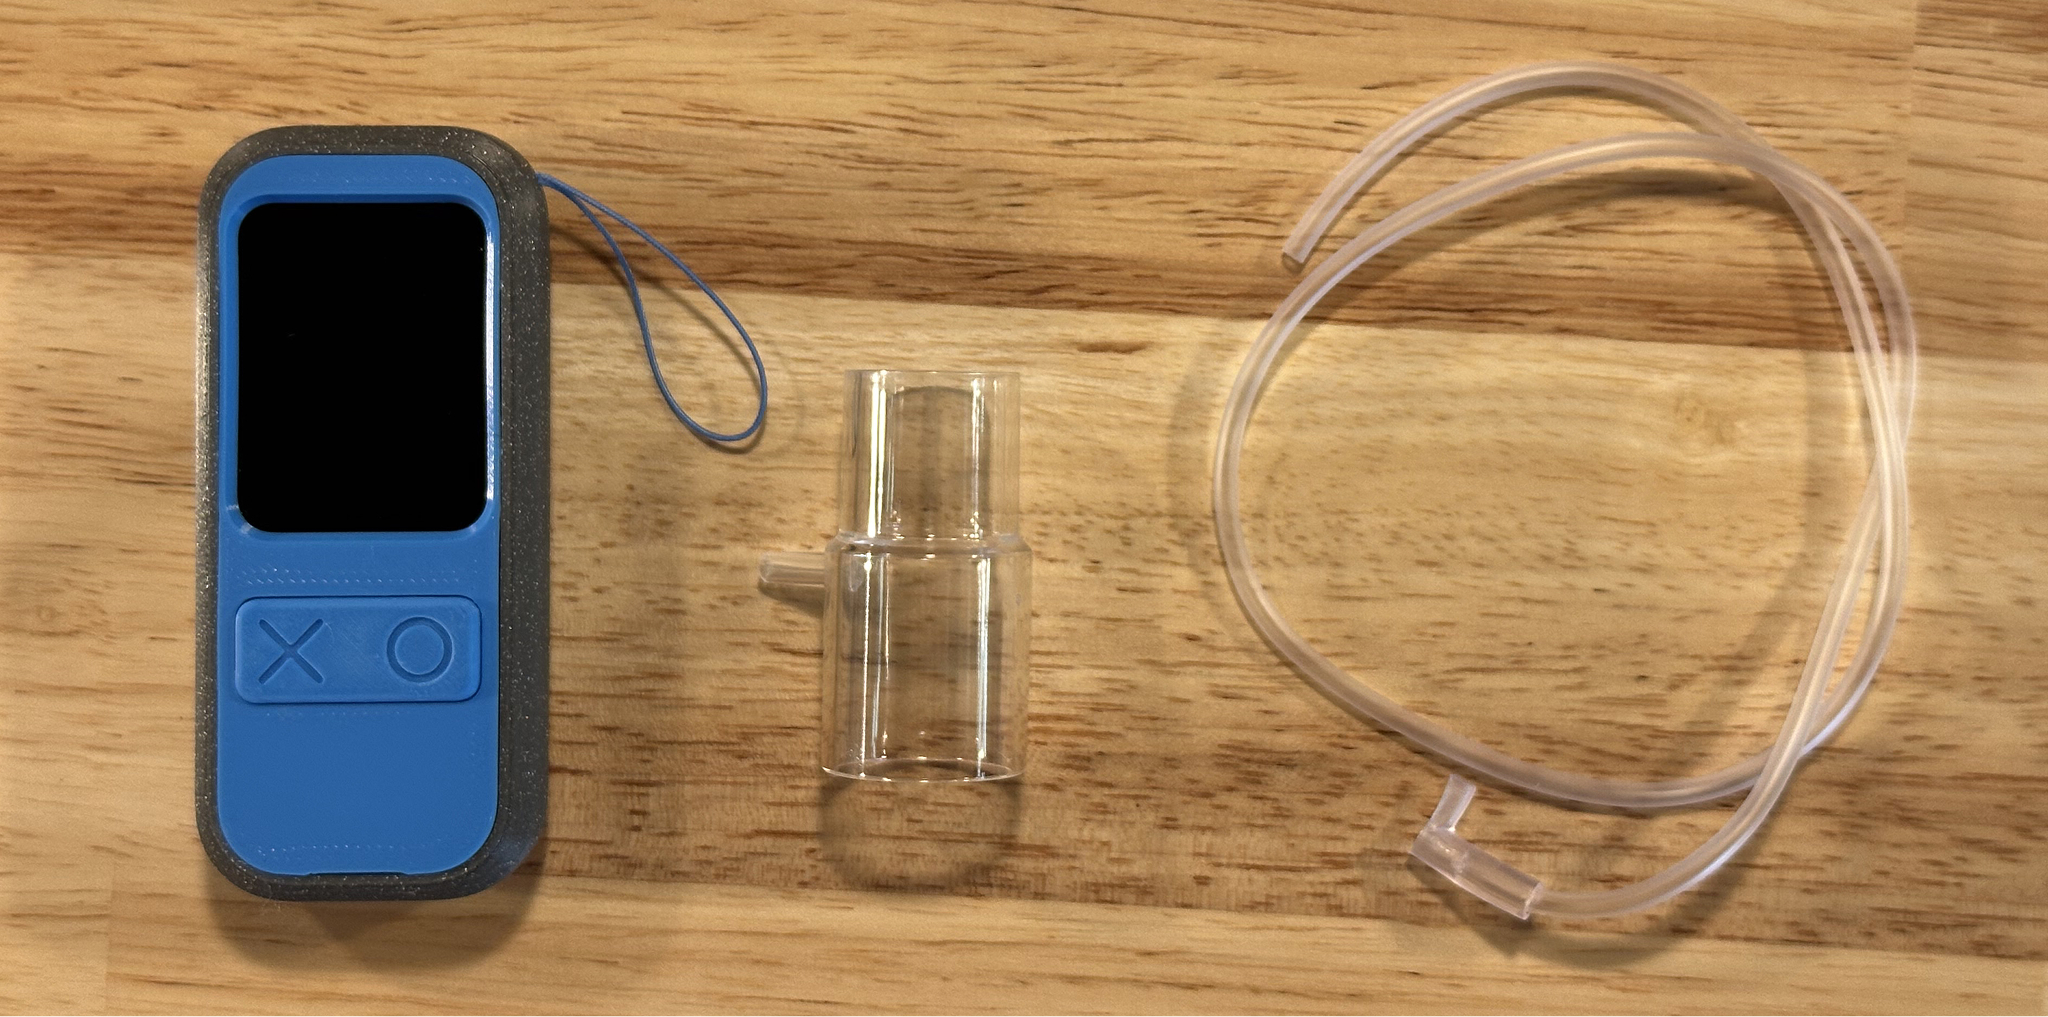
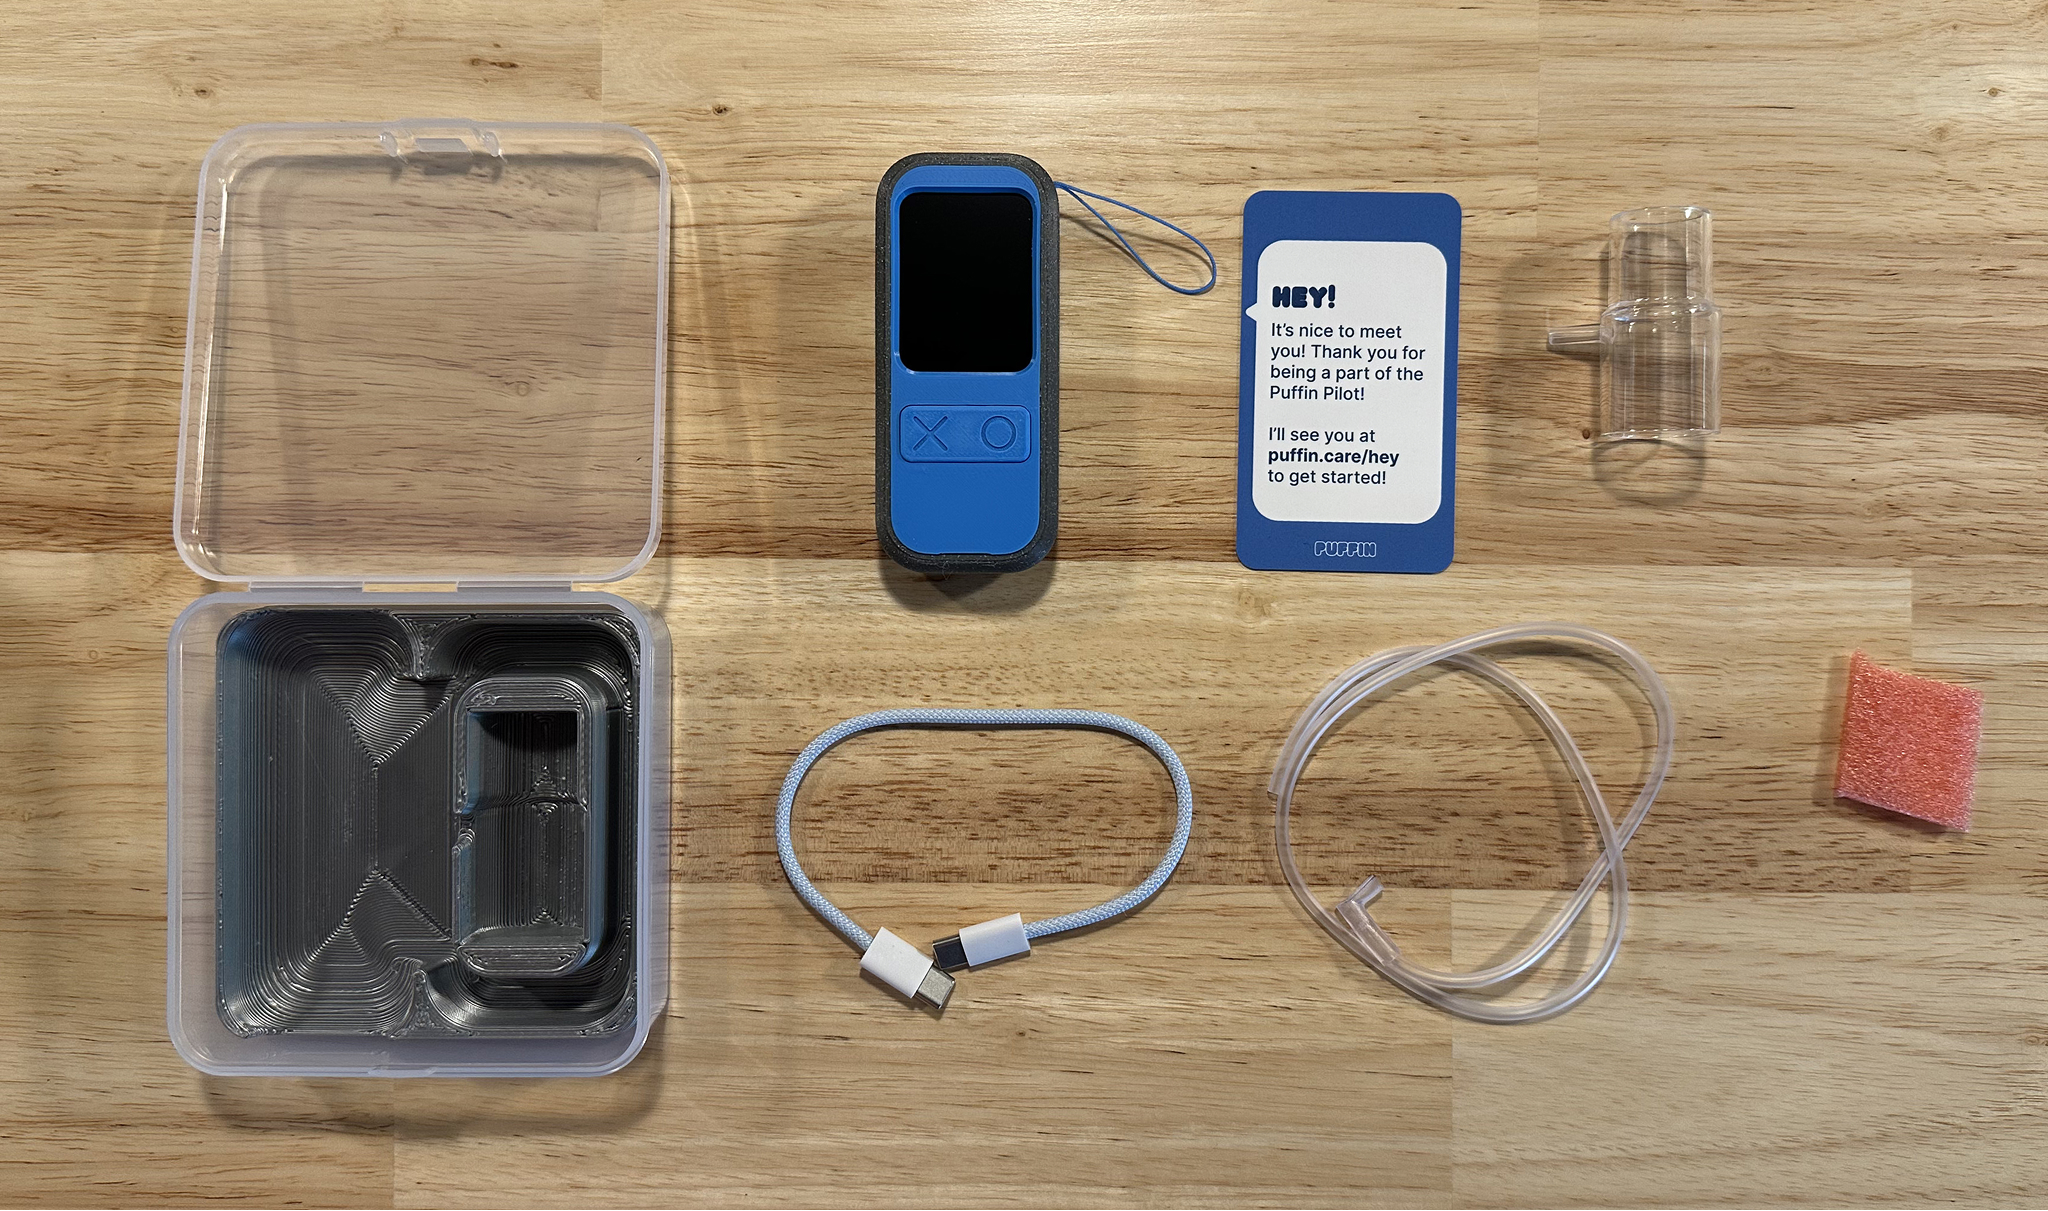
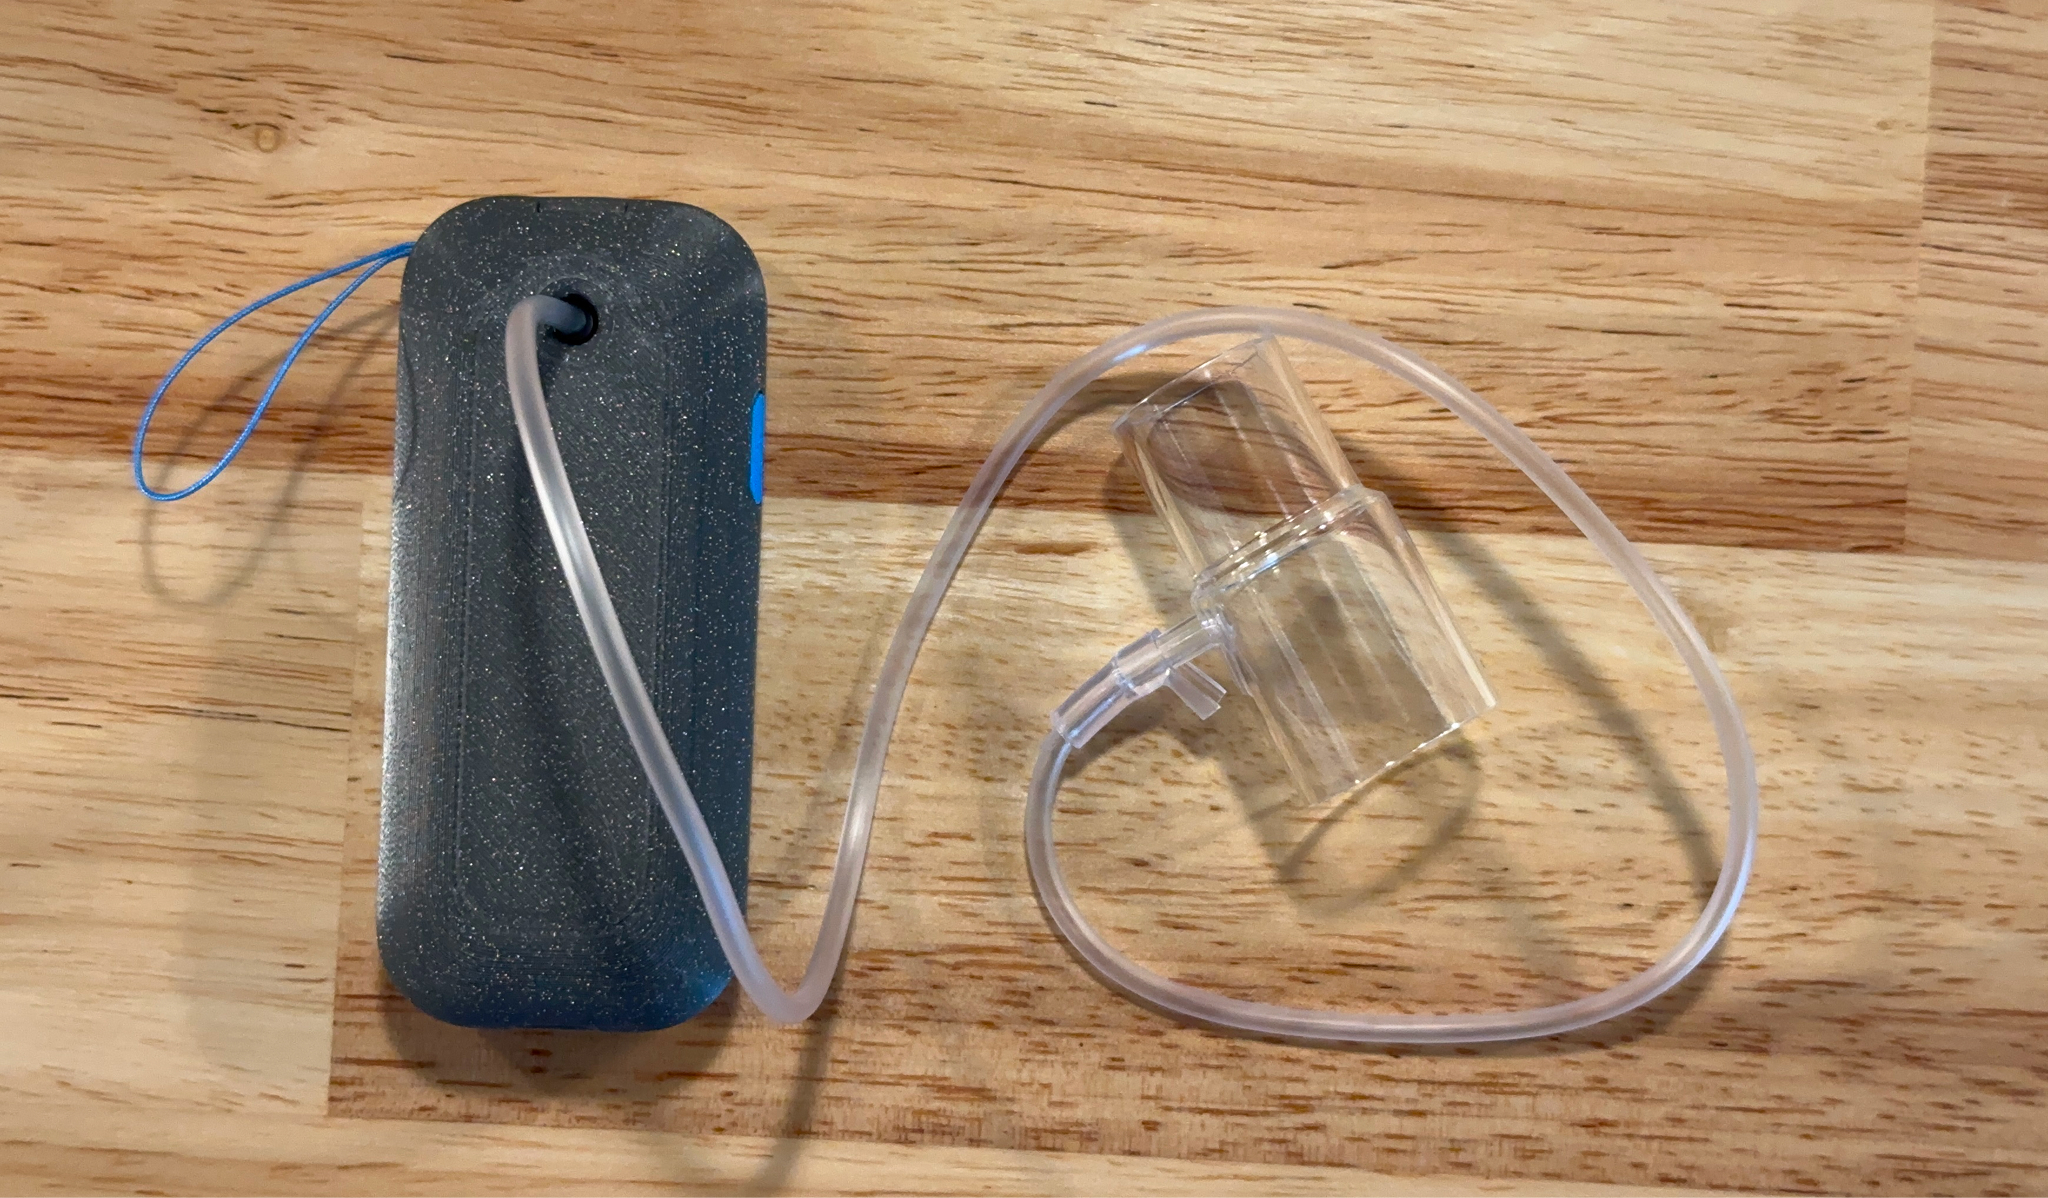
Step 1: What's in the Package
List:
- Puffin device
- Instruction card
- Airway clearance adaptor
- USB-C charge cable
- Flexible tubing
- Spacer (for packing)
- Case

Package contents
Step 2: Charging the Device
Any USB-C charger or cable can be used. When charging, the red light will come on (this can be hard to see). The red light will turn off when fully charged.

Charging the device
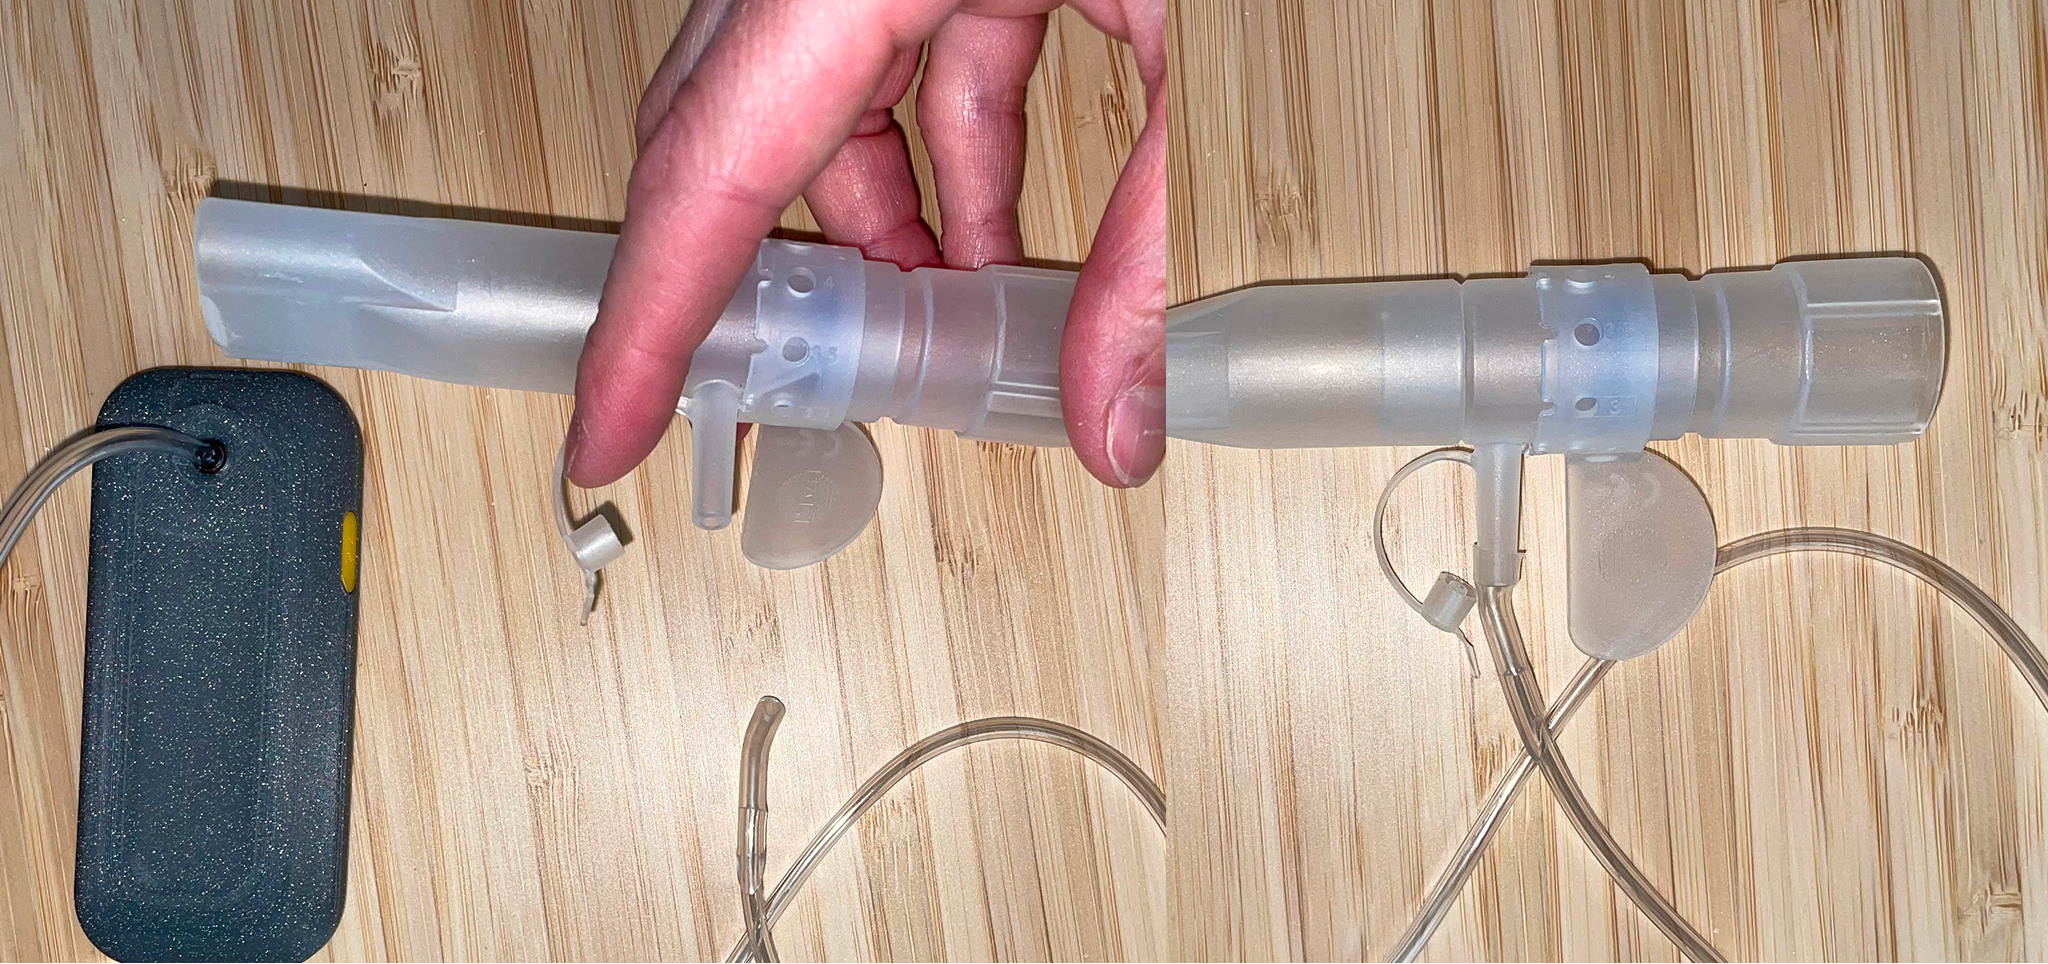
Step 3: Assemble the Mouthpiece Adapter
1: Overview
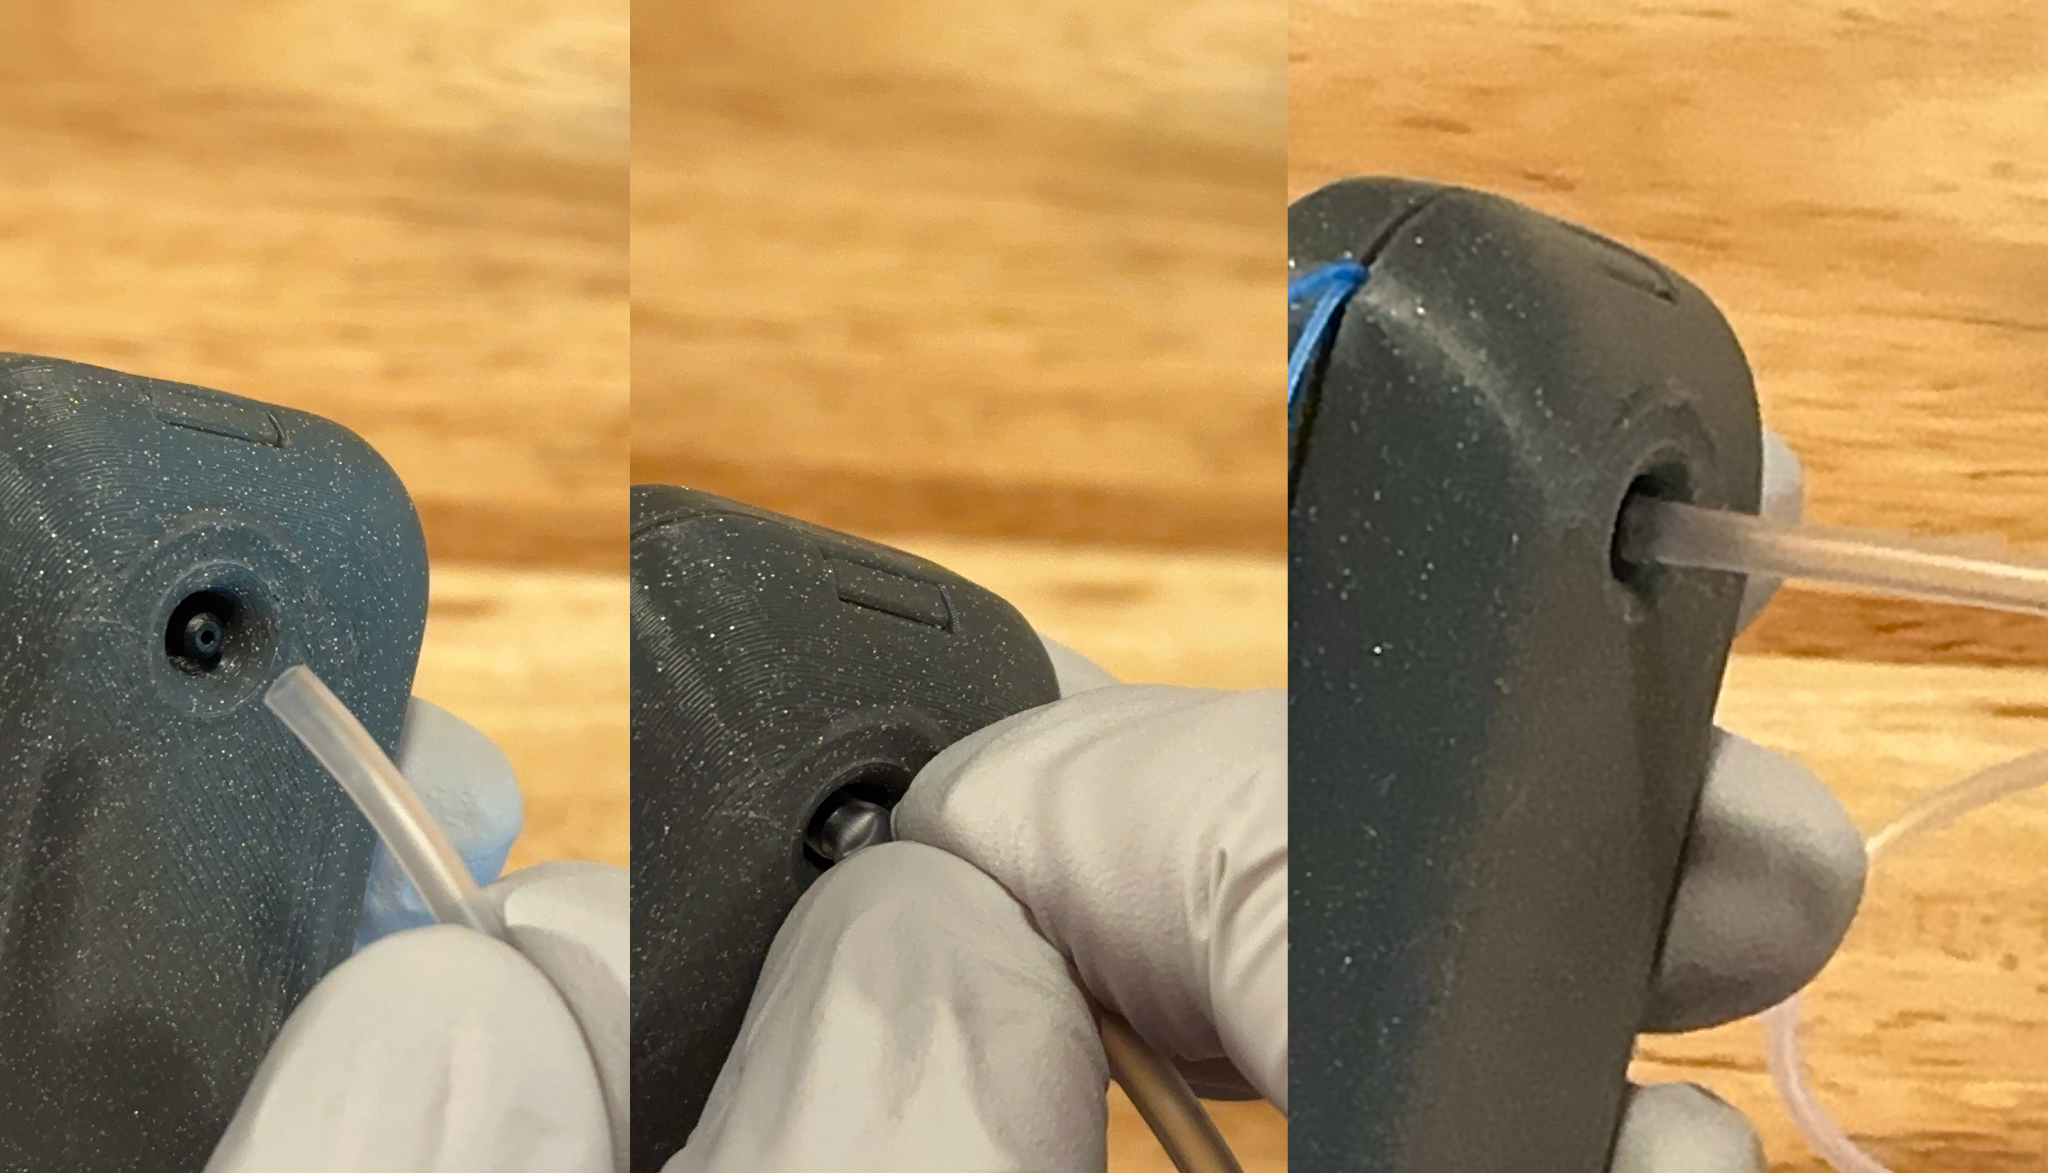
2: Press small end of flexible tube over the attachment point on back of device. You may need to squish this over using a thumb and finger. Once on, you should be able to pull the tube lightly without it coming off.

3: Press the large end of the flexible tube on the measurement port on the adaptor.

4: Fully assembled device
Step 4: Assemble with Acapella (Alternative)
If you are using an Acapella device, follow these assembly instructions. Connect the adaptor to the Acapella following the picture instructions.
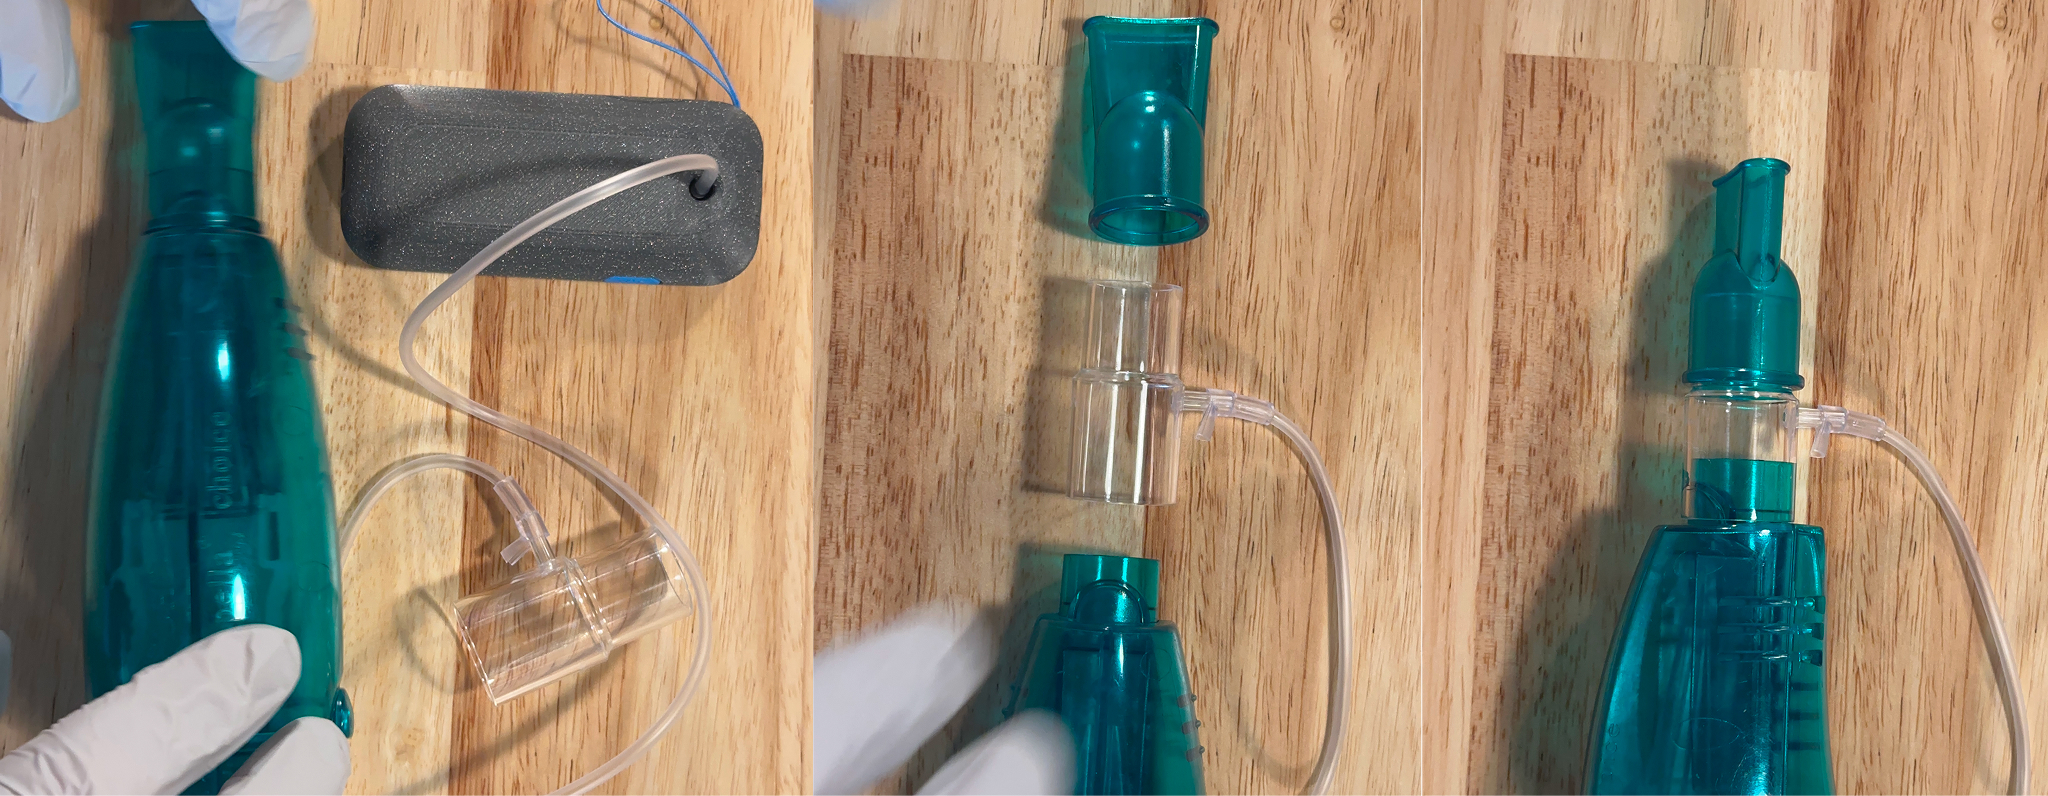
Connect the adaptor to the Acapella device
Step 4: Assemble with Pari Pep (Alternative)
If you are using a Pari Pep device, follow these assembly instructions. The adaptor tube can be connected directly to the Pari Pep's sensor port.

Connect the adaptor tube directly to the Pari Pep's sensor port
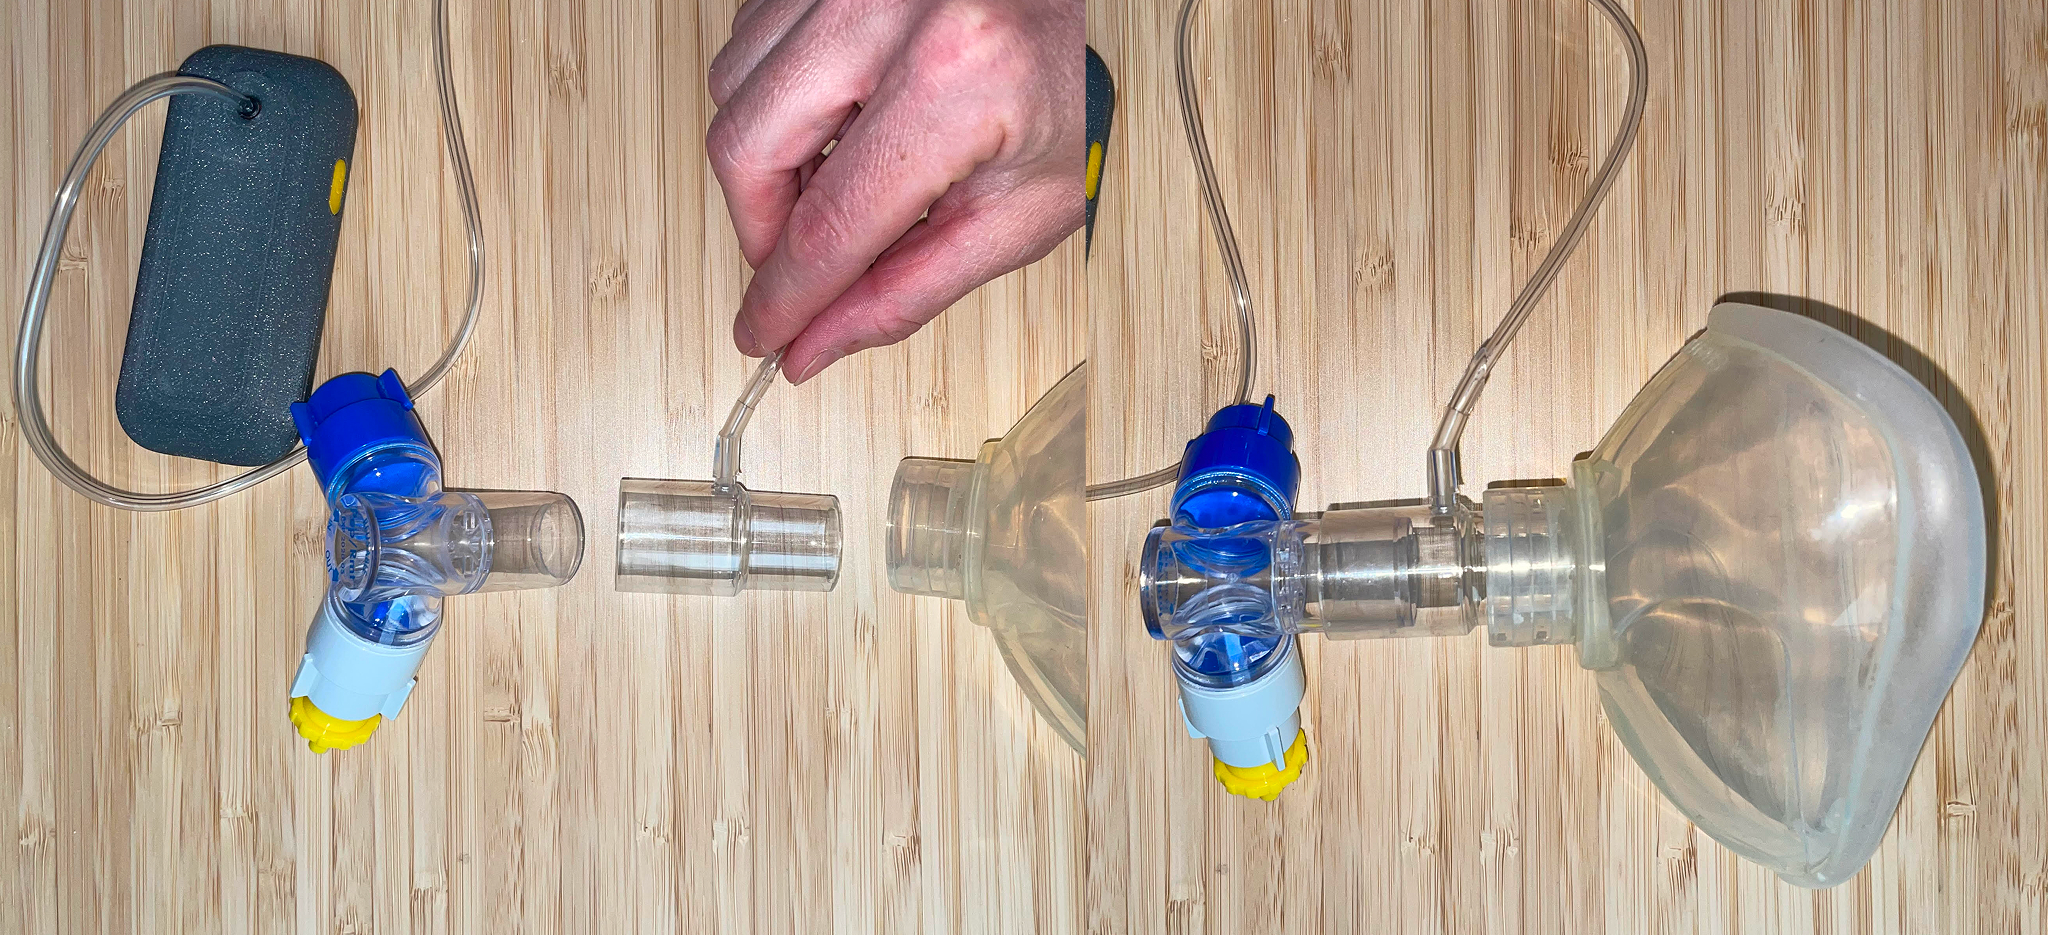
Step 4: Assemble with Pep Mask (Alternative)
If you are using a Pep Mask, follow these assembly instructions. The adaptor assembled in the previous steps will be added to the Pep Mask following the picture instructions.

Add the assembled adaptor to the Pep Mask
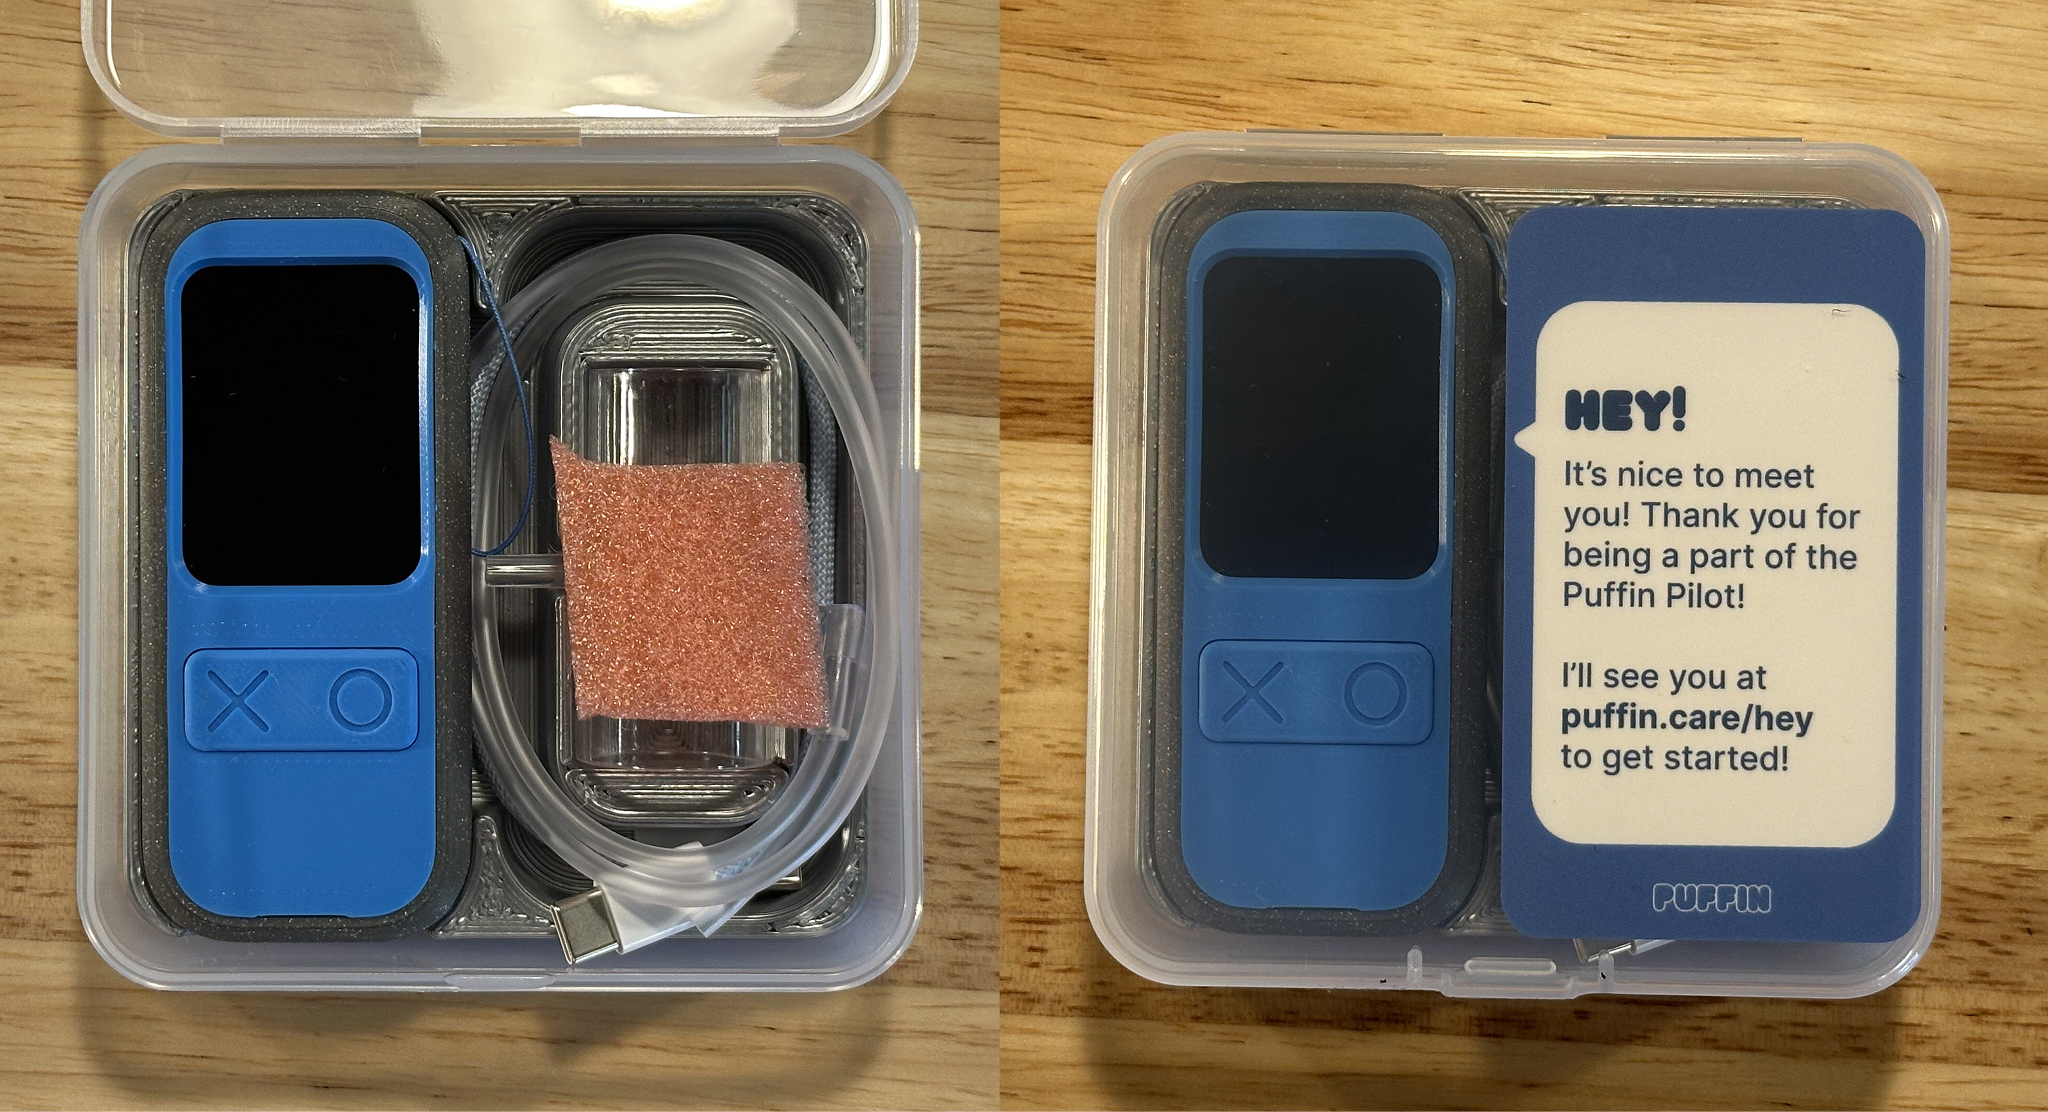
Step 4: Store Device
Flexible tube and USB-C cable can be stored wrapped around the recessed adaptor holder. Push adaptor firmly into place as shown on image. Puffin device will clip in next to this. If desired, the foam can be placed on top of adaptor and the card placed on top of this to prevent movement when closed.

Store components in case
Step 5: How to Hold the Device
The device can be held in one hand in portrait mode or rested on the table or other surface in landscape mode.
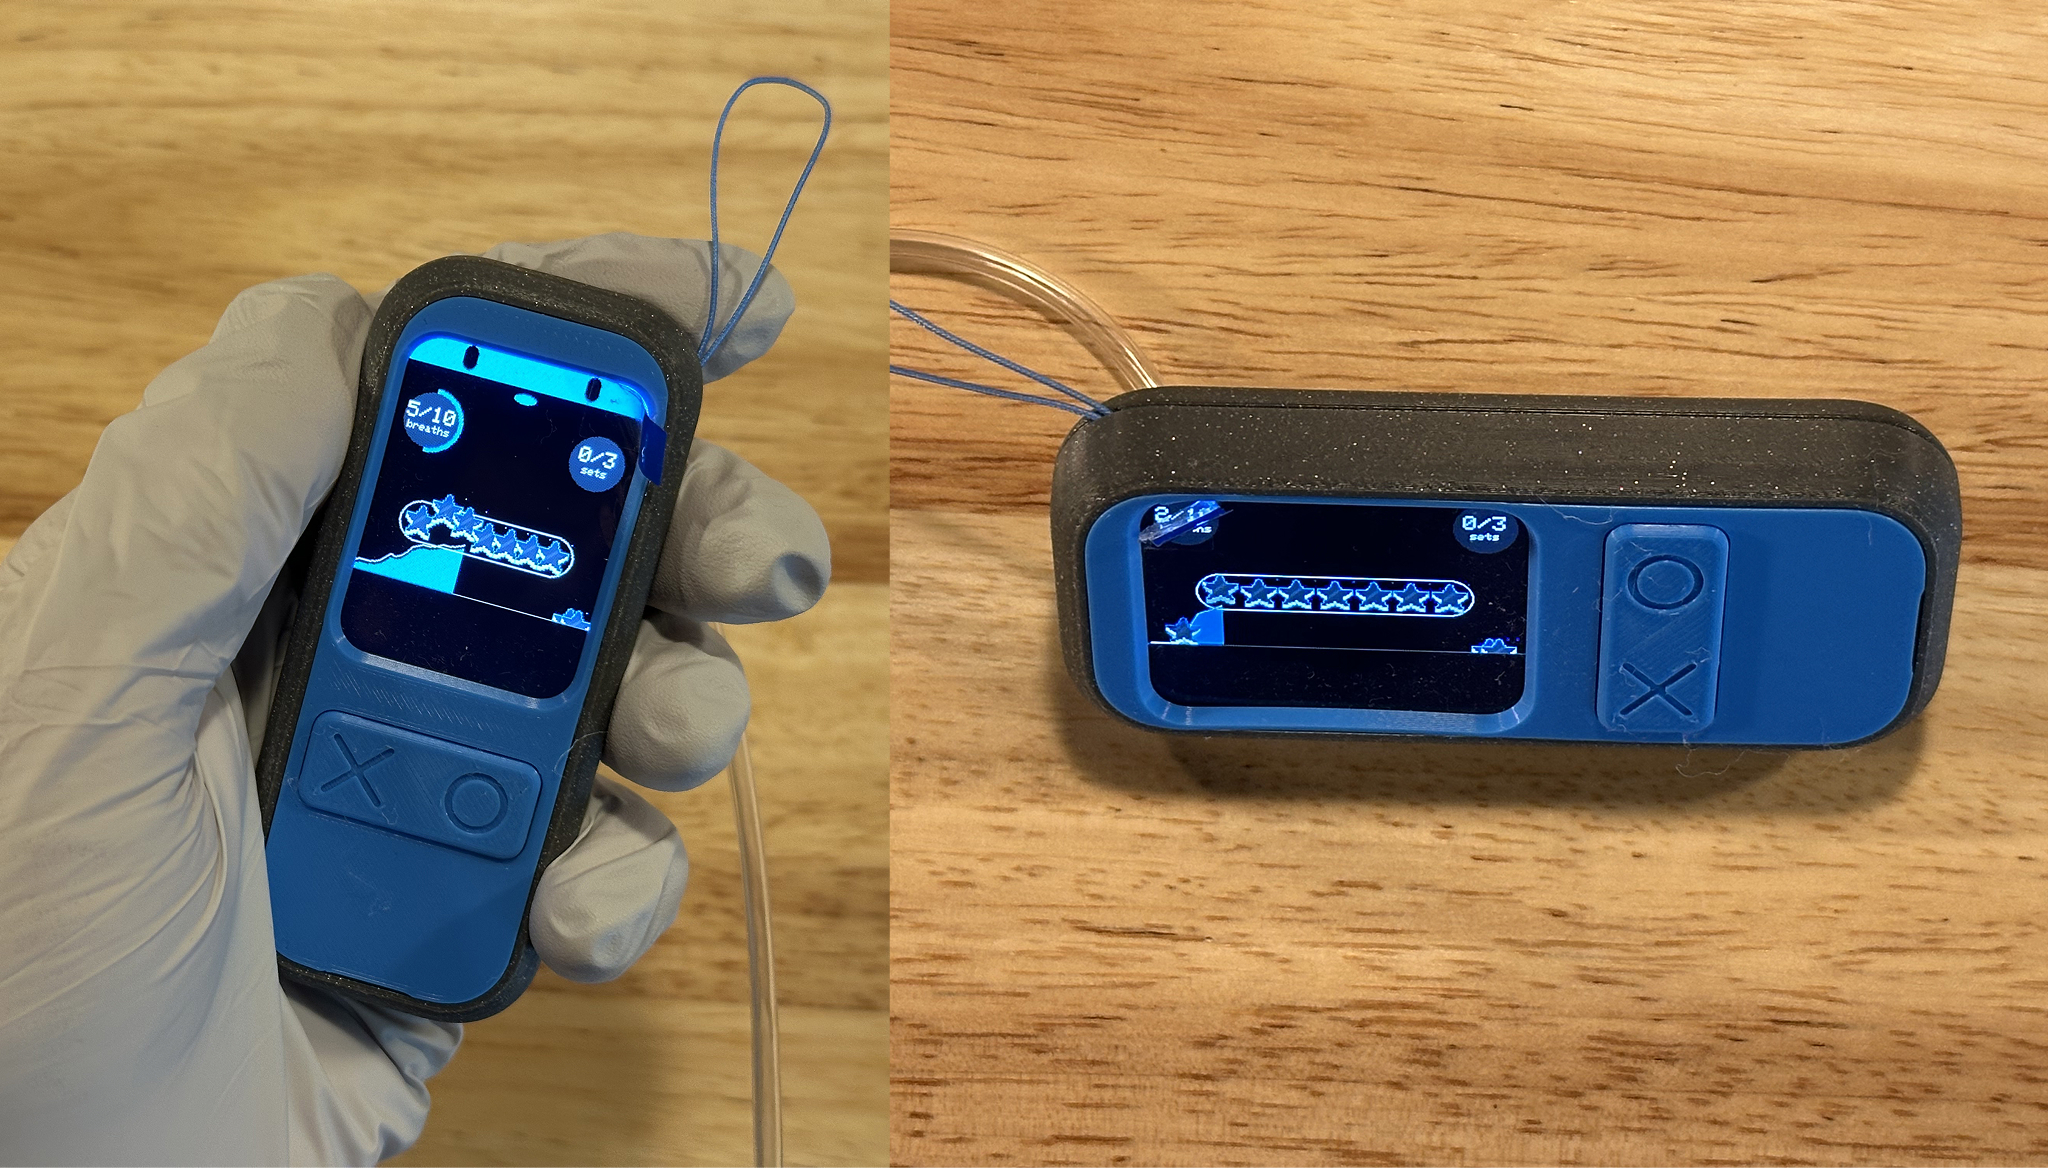
How to hold the device
Step 6: Download App and Initial Setup
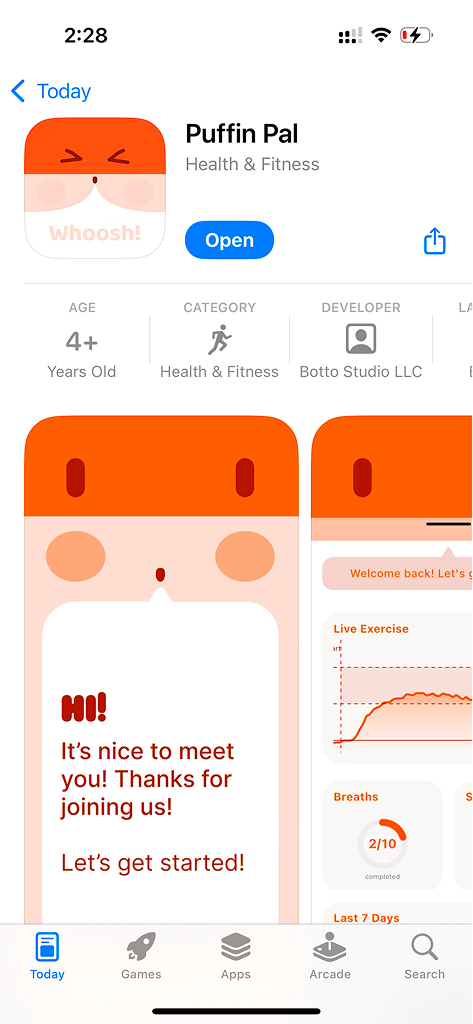
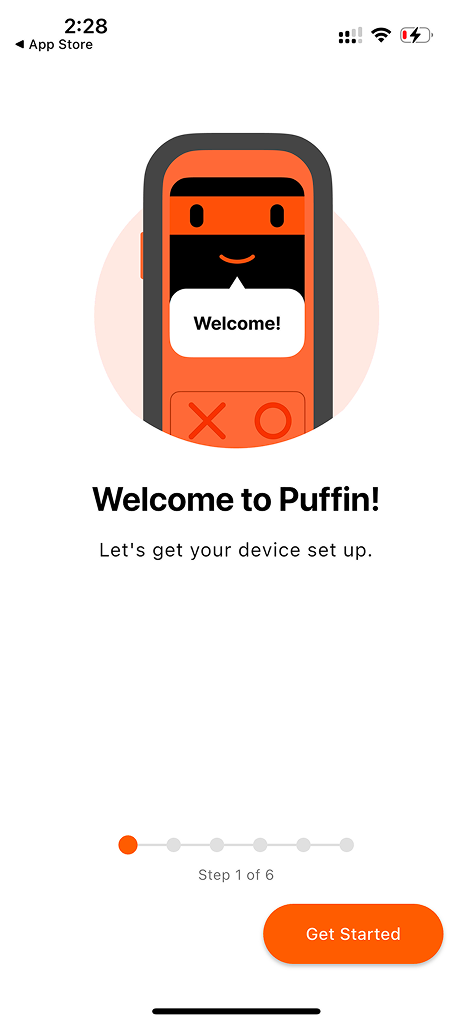
2: Tap Get Started
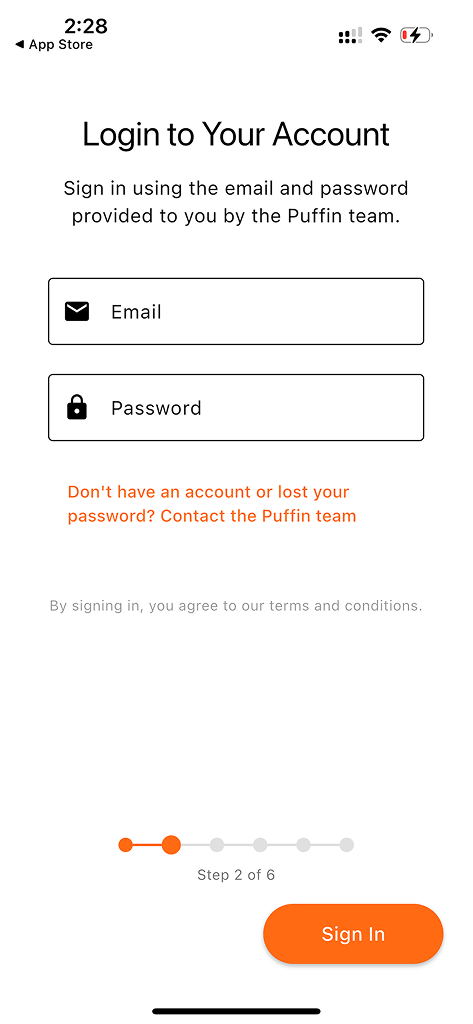
3: Login using credentials provided to you. If you did not receive credentials please email help@puffin.care
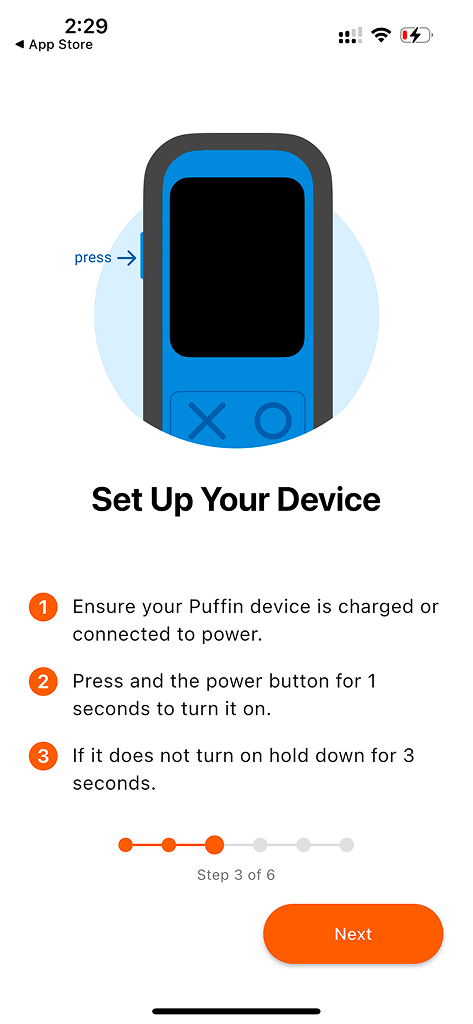
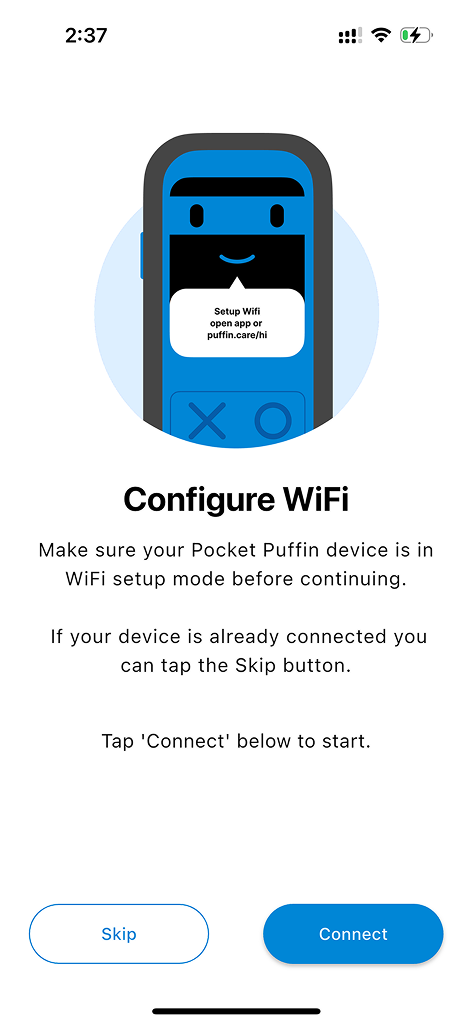
4: Turn on your device
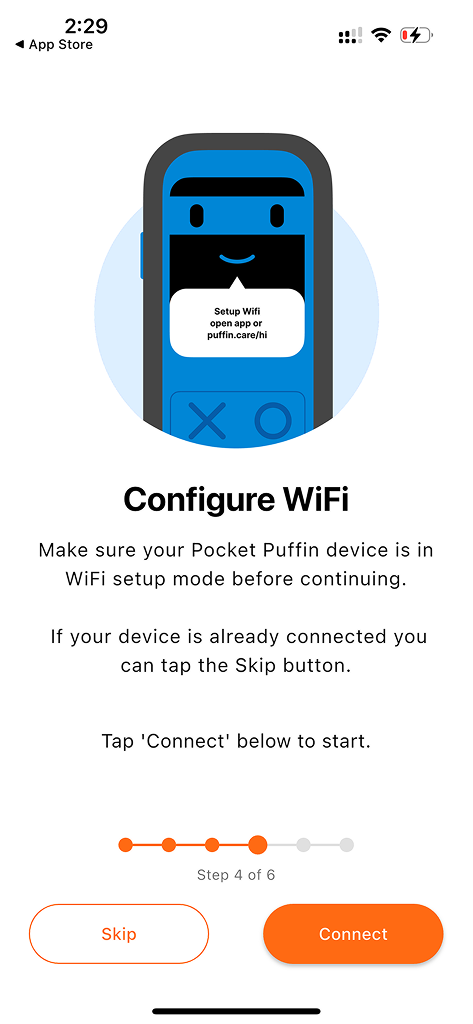
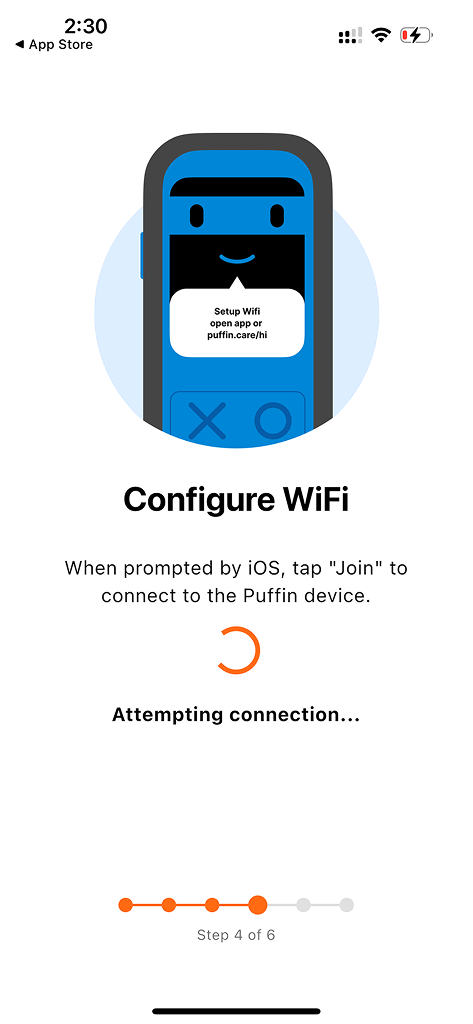
5: Start WiFi connection
6: Select your network
7: Please wait
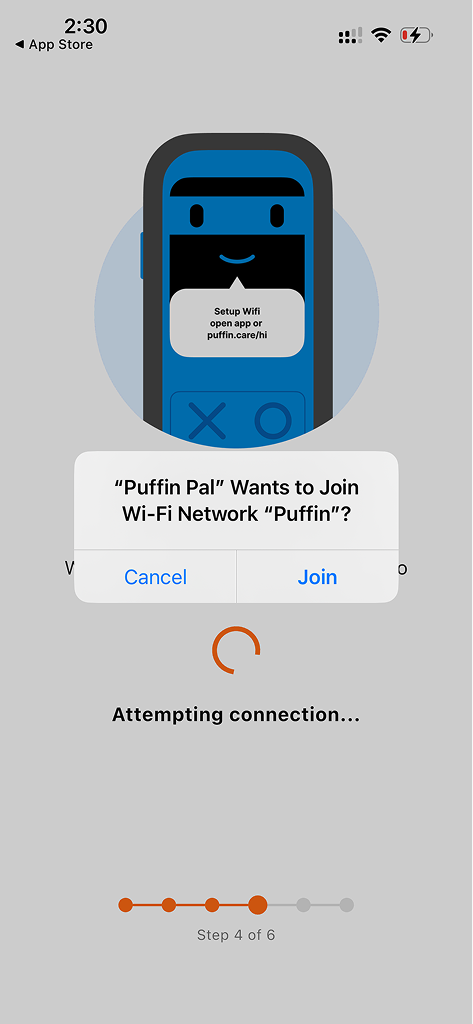
8: Tap Join
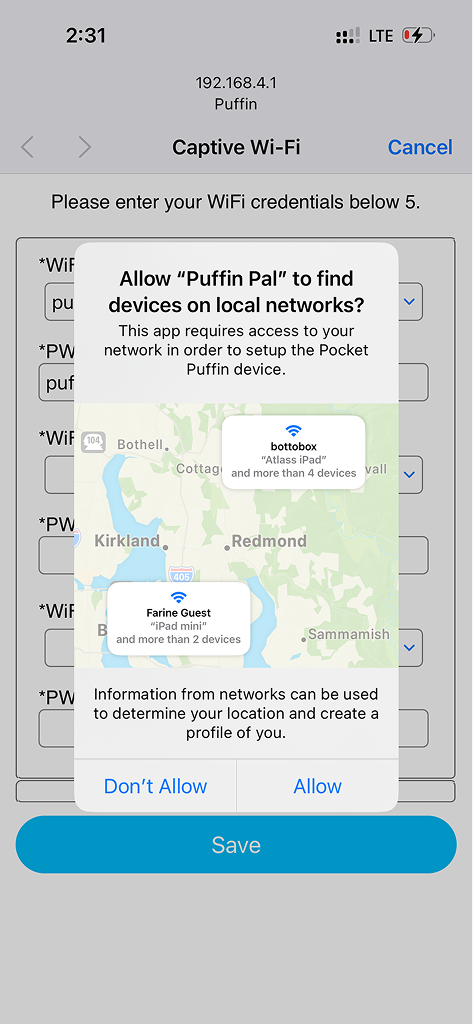
9: Tap Allow
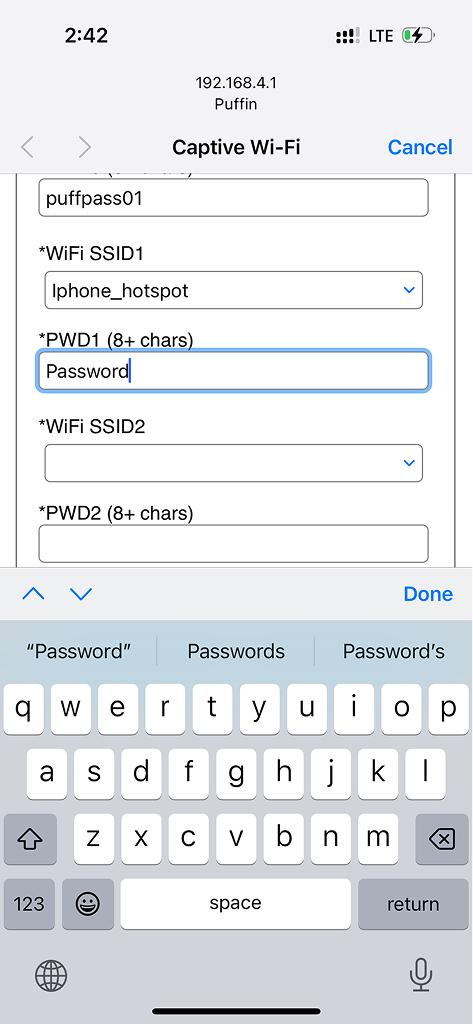
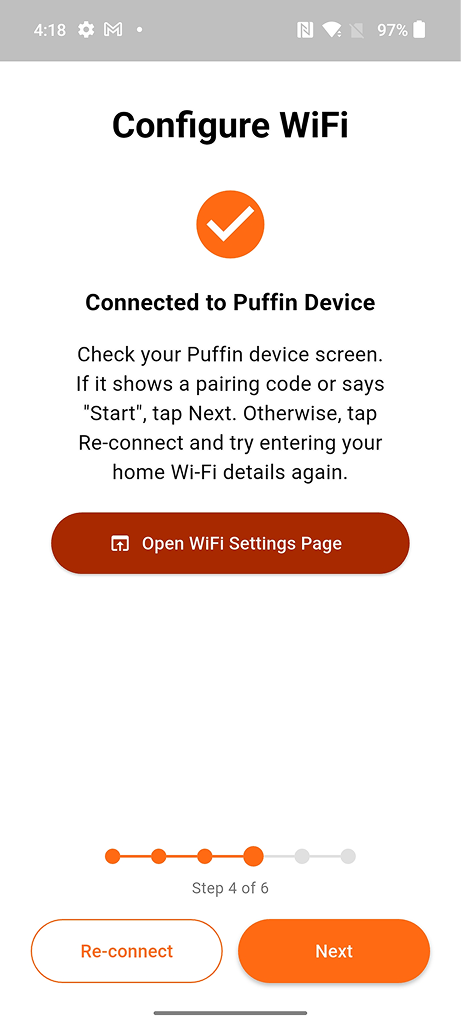
10: Enter your home WiFi credentials. Tap the dropdown to view available networks. The first puffin_network can be left as is for backup. The device will connect to the first available network listed. Check that password or SSID was not capitalized unintentionally.
11: Switch back to Puffin app
12: Tap Next to continue
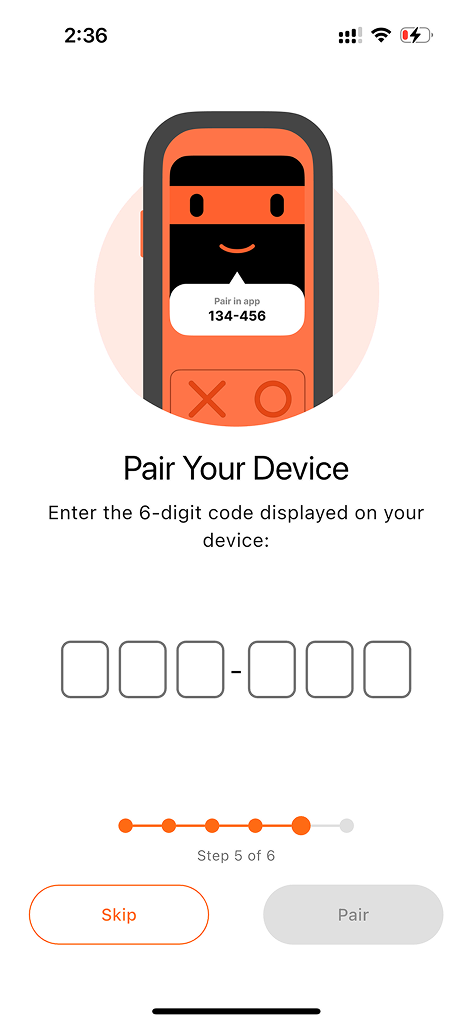
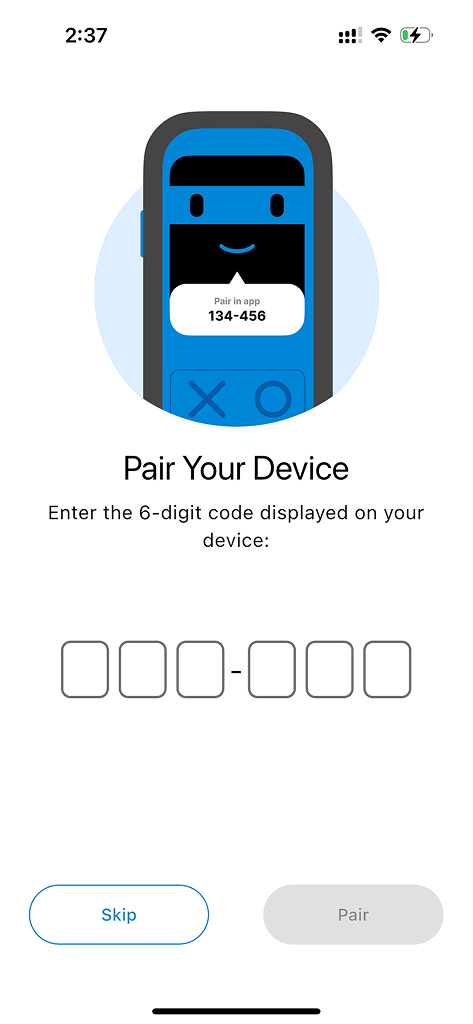
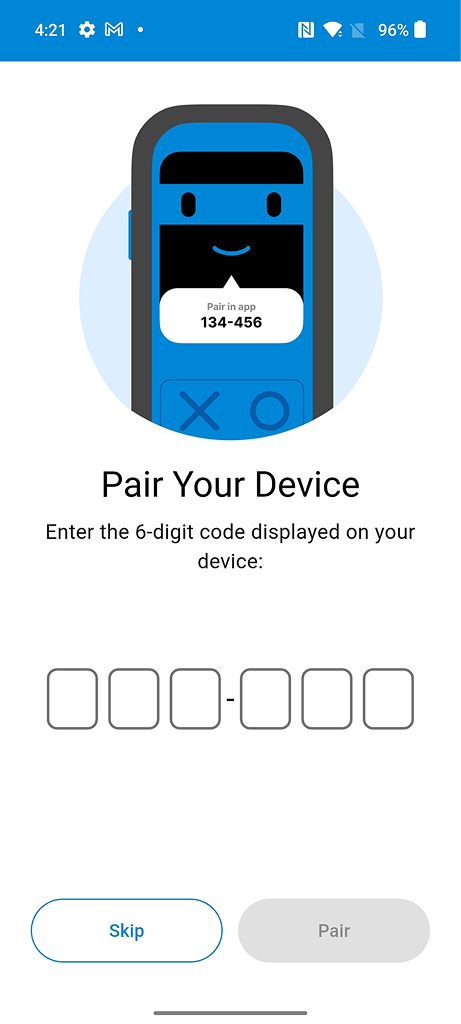
13: Pair with your device
14: Enter the pair code that should now be shown on your device

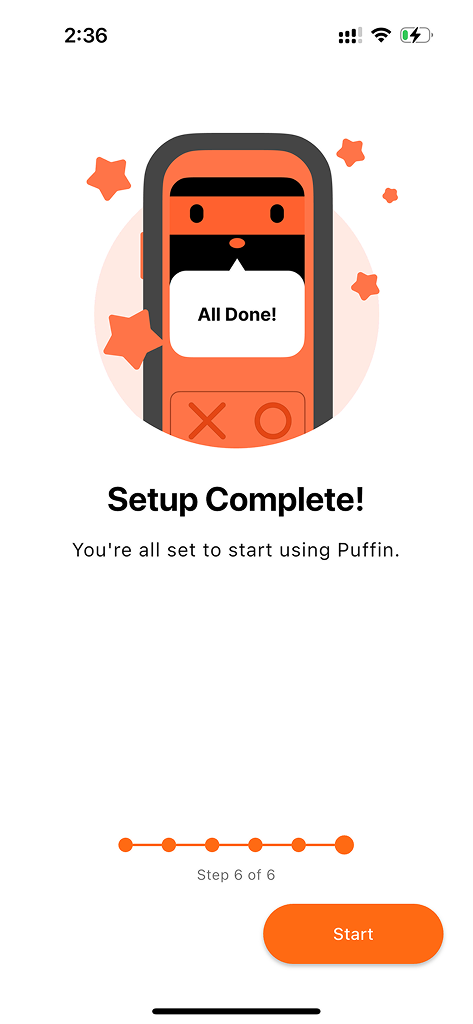
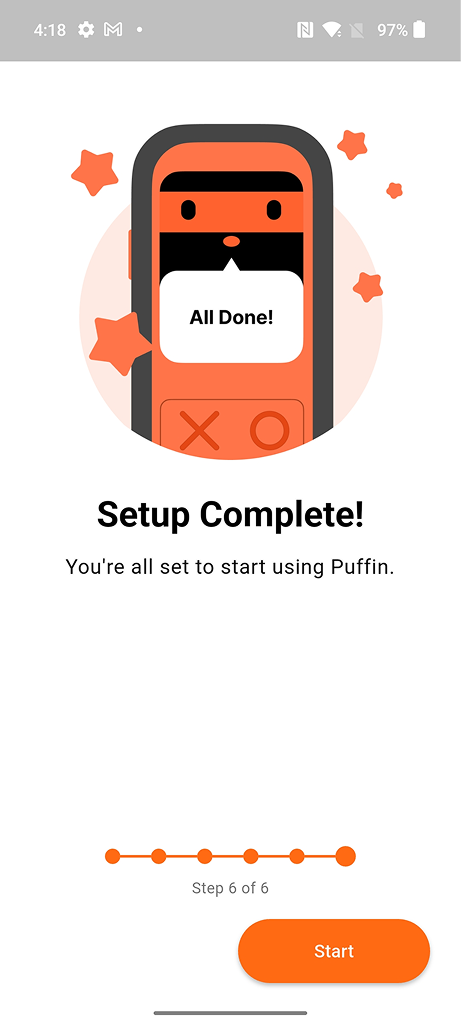
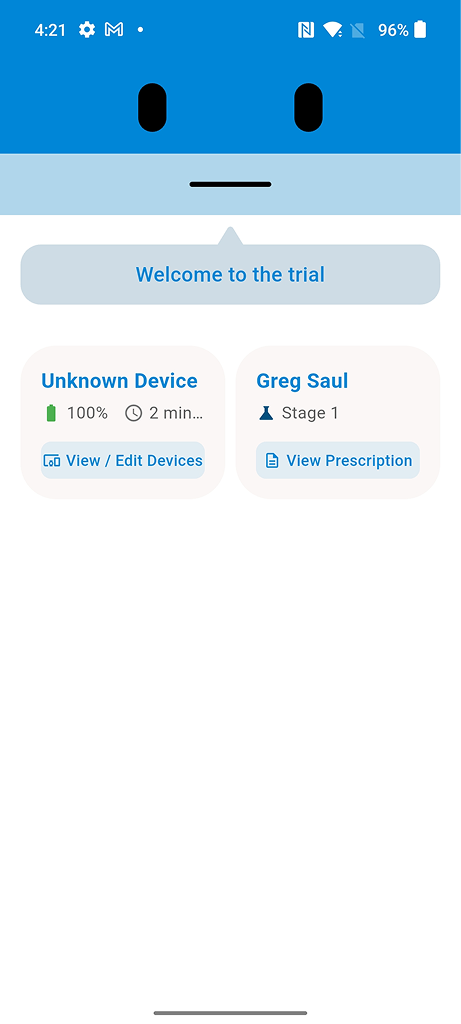
15: Setup complete
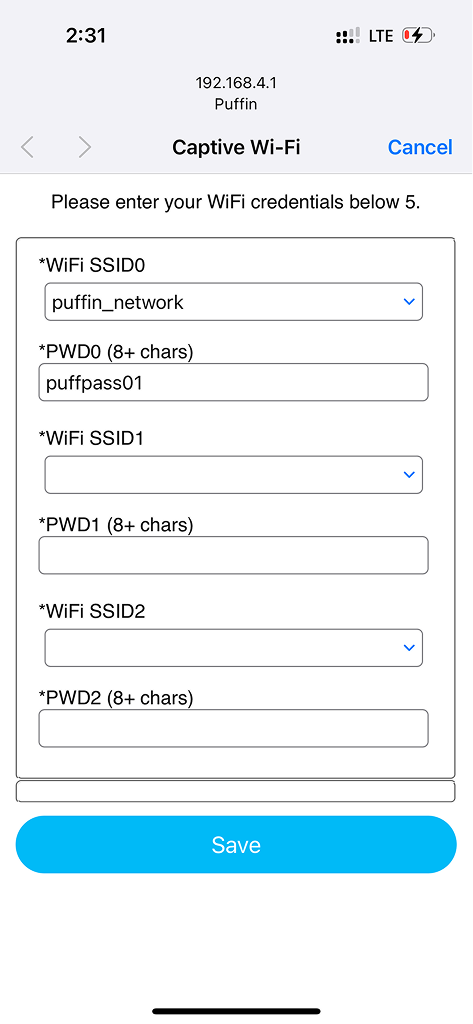
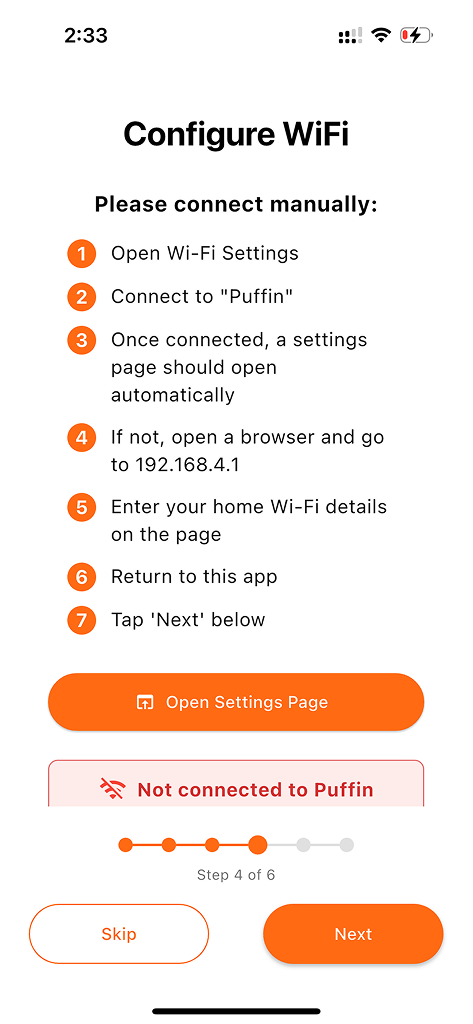
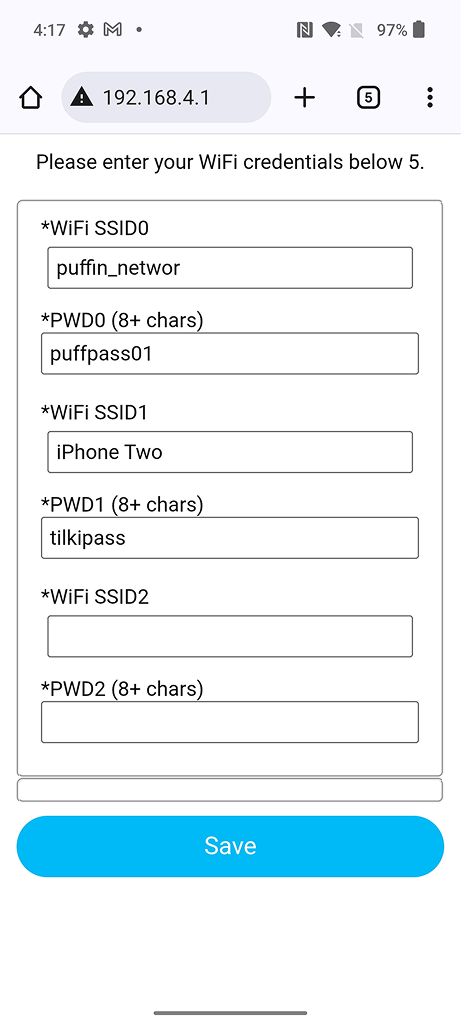
Step 7: Manual WiFi Setup (Alternative Method)
- If WiFi does not connect, make sure the Puffin Device is on and in WiFi setup mode.
- Open the Settings app on your device and select Wi-Fi
- Select "Puffin". If not showing, try restarting the Puffin Device
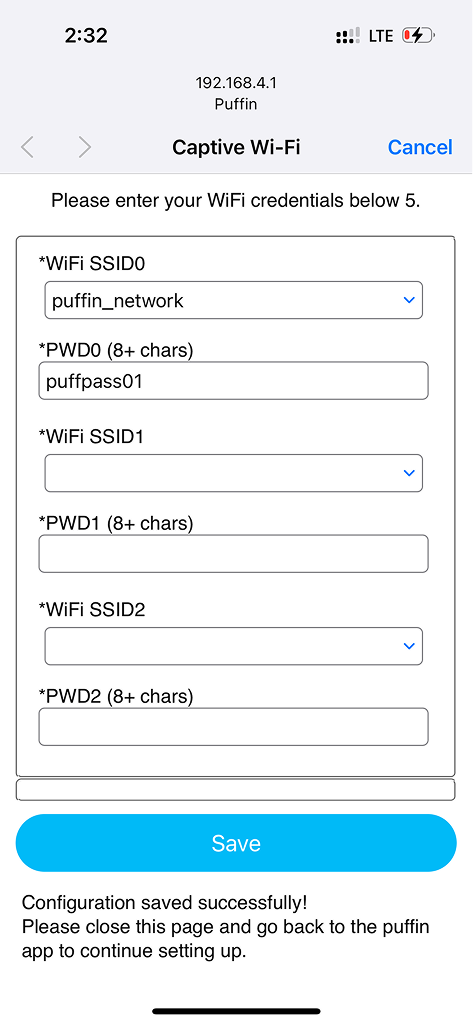
- Enter home WiFi credentials into portal and press save

1: Manual setup option
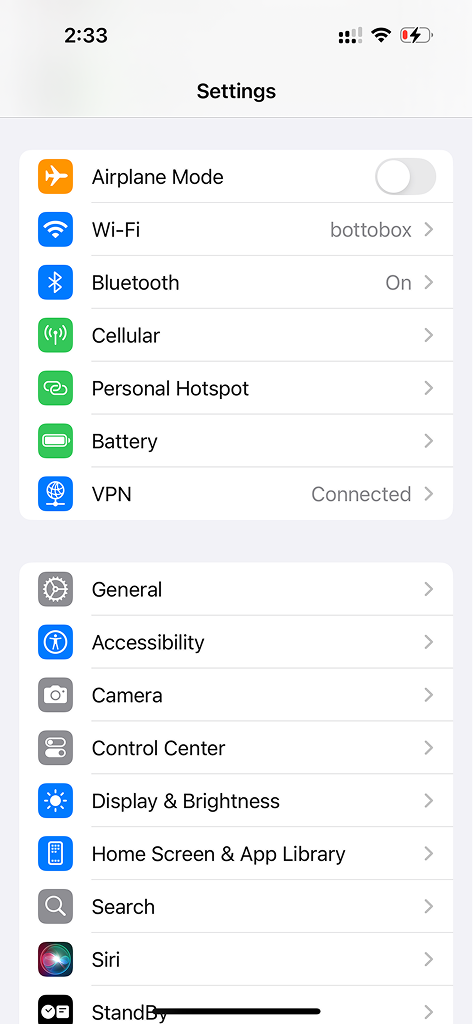
2: Go to iOS Settings
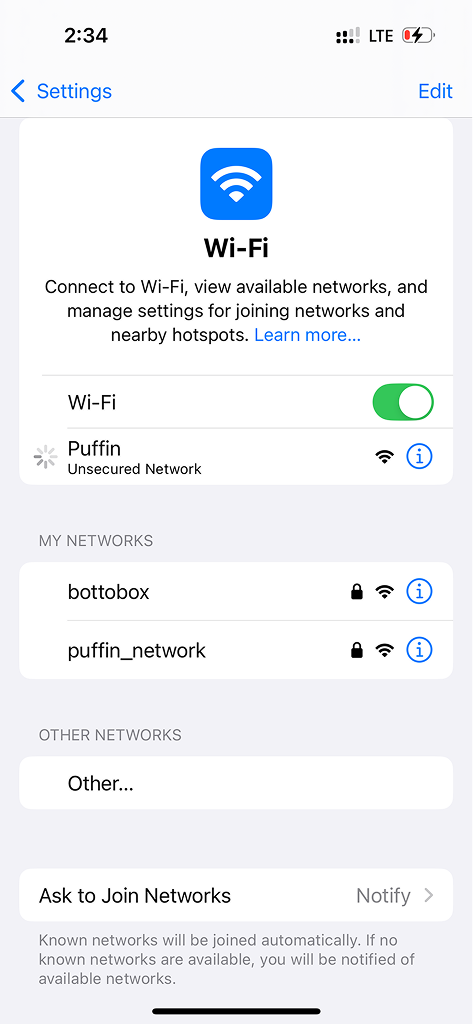
3: Select Puffin network

4: Enter WiFi credentials and save

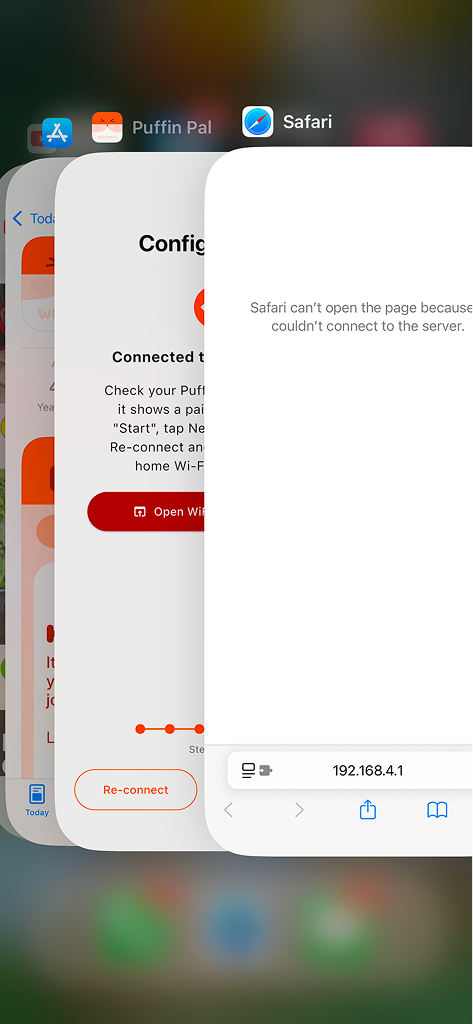
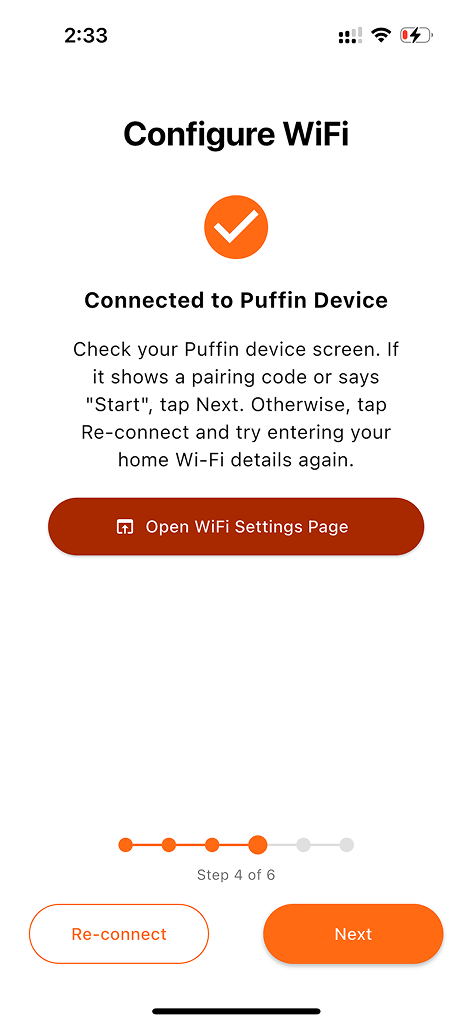
Return to Puffin app
Continue setup
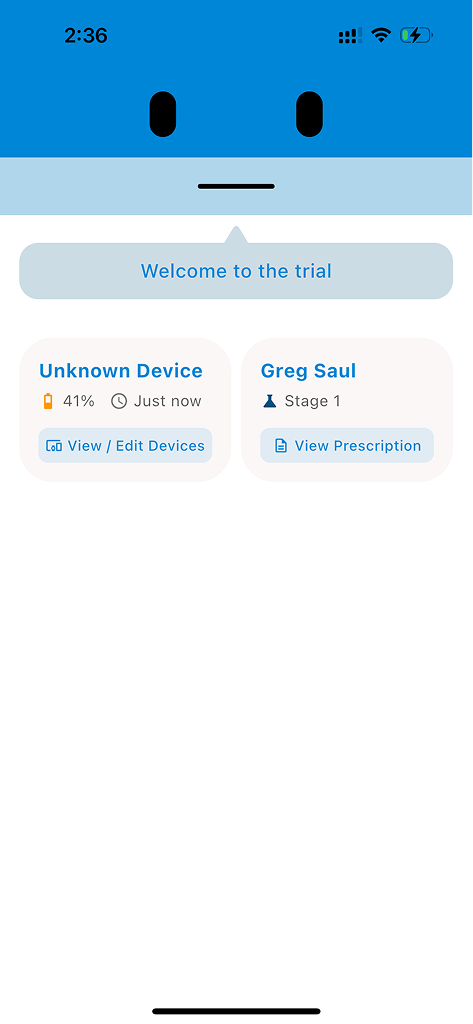
Step 8: Adding Another Device
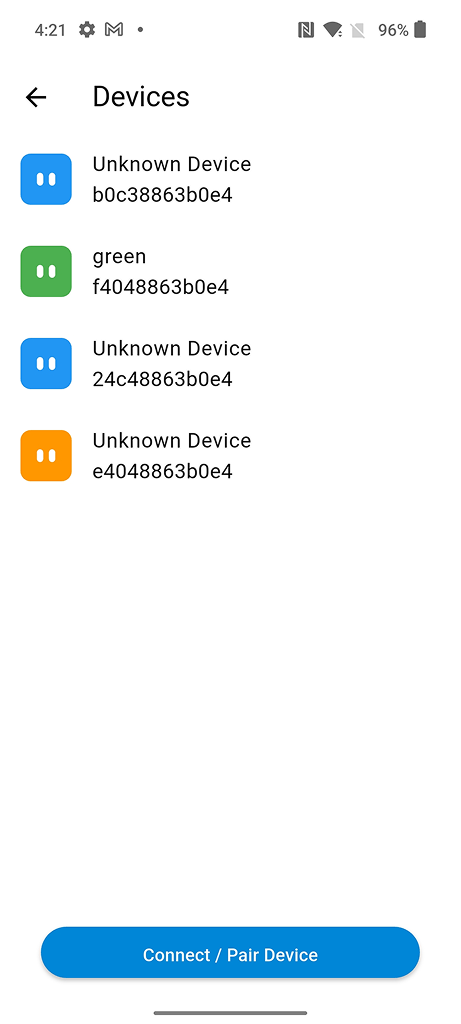
- Tap View / Edit Devices
- Connect / Pair Device
- If not connected to WiFi, select "connect"
- Enter pair code shown on Puffin device once connected to WiFi. (If the device is paired with another account the code will not show. If this is the case, contact the Puffin team)

1: Tap Add a Device
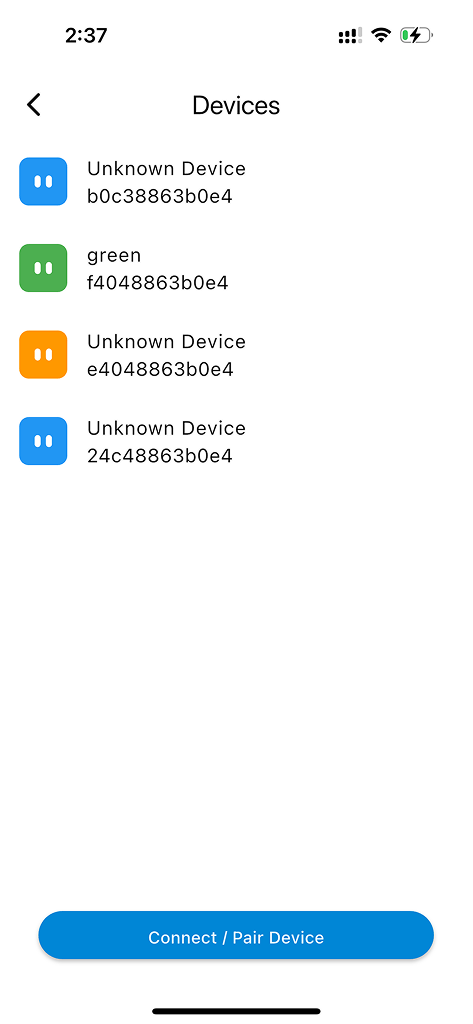
2: Connect / Pair Device
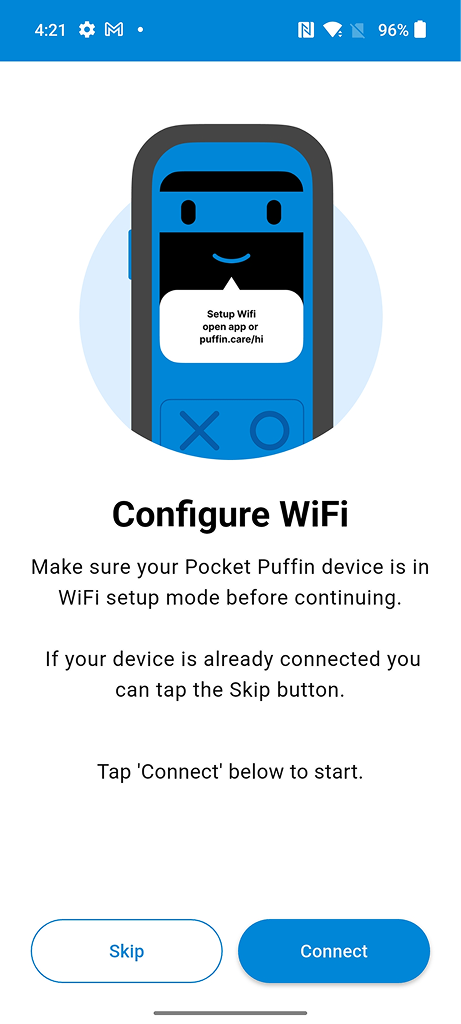
3: Configure WiFi if needed
4: Enter pair code
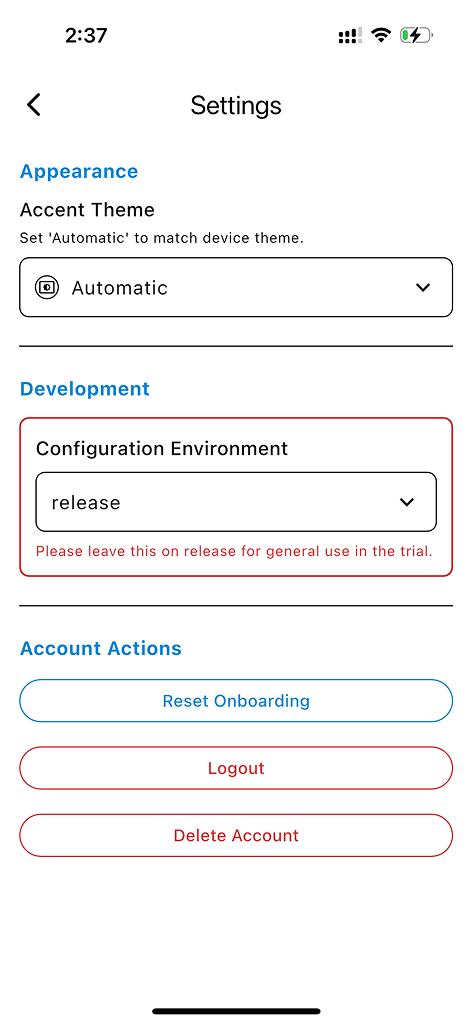
Step 9: How to Logout
- Tap View Prescription
- Tap Edit Profile
- Tap Logout
1: Tap View Prescription
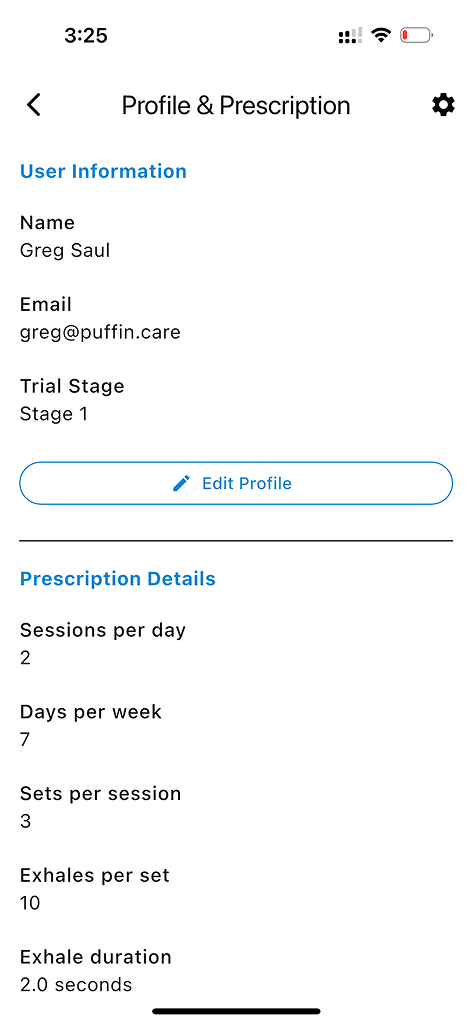
2: Tap Edit Profile
3: Tap Logout
Step 10: Using iPhone Hotspot (No WiFi Available)
If you need to use your iPhone's hotspot to connect the device, please follow these instructions carefully otherwise the device may not connect.
- You will need to connect to the device first and manually enter your hotspot credentials (see Step 7)
- Open your device's Settings app then Personal Hotspot
- Turn on "Maximize Compatibility"
- Keep open and restart the device
1: Use iPhone Hotspot option
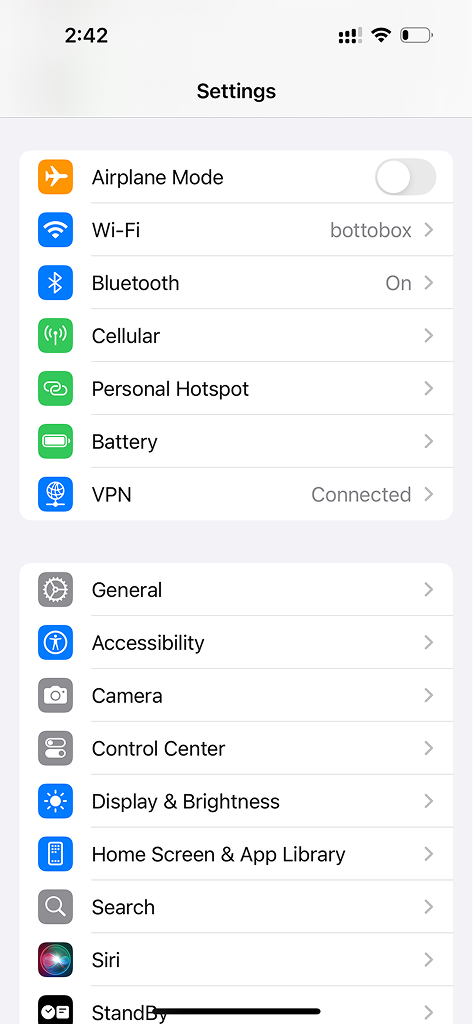
2: Open Settings > Personal Hotspot
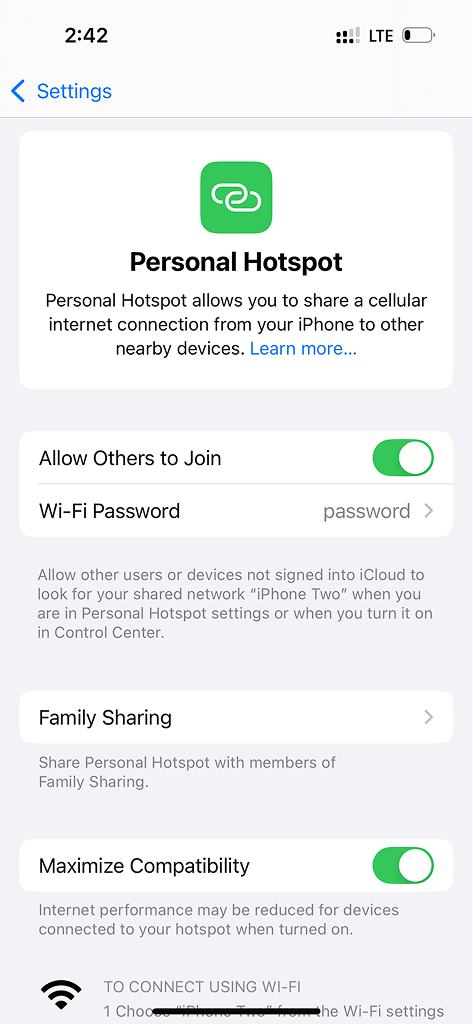
3: Turn on Maximize Compatibility
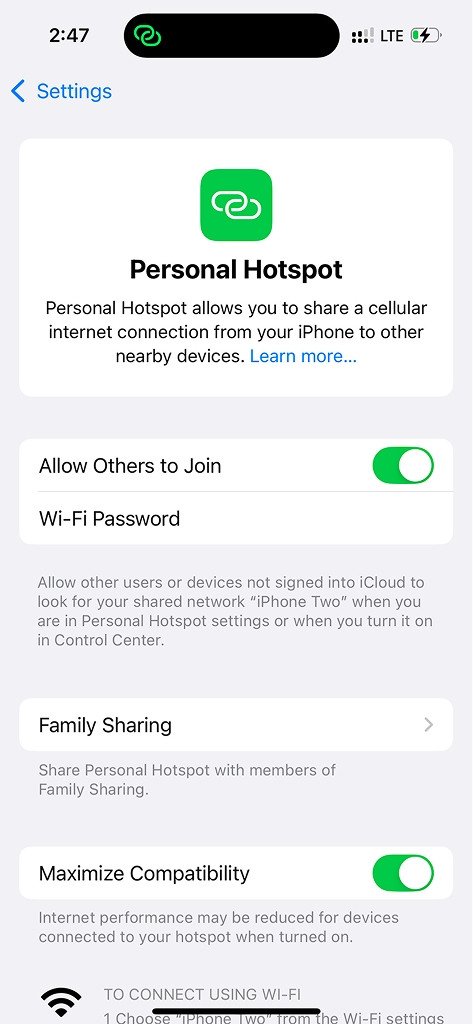
4: Keep open and restart device
Step 1: What's in the Package
List:
- Puffin device
- Instruction card
- Airway clearance adaptor
- USB-C charge cable
- Flexible tubing
- Spacer (for packing)
- Case
Package contents - Puffin device, charging cable, and adapters
Step 2: Charging the Device
Any USB-C charger or cable can be used. When charging, the red light will come on (this can be hard to see). The red light will turn off when fully charged.

Charging the device
Step 3: Assemble the Mouthpiece Adapter

1: Overview

2: Press small end of flexible tube over the attachment point on back of device. You may need to squish this over using a thumb and finger. Once on, you should be able to pull the tube lightly without it coming off.

3: Press the large end of the flexible tube on the measurement port on the adaptor.
4: Fully assembled device
Step 4: Assemble with Acapella (Alternative)
If you are using an Acapella device, follow these assembly instructions. Connect the adaptor to the Acapella following the picture instructions.

Connect the adaptor to the Acapella device
Step 4: Assemble with Pari Pep (Alternative)
If you are using a Pari Pep device, follow these assembly instructions. The adaptor tube can be connected directly to the Pari Pep's sensor port.
Connect the adaptor tube directly to the Pari Pep's sensor port
Step 4: Assemble with Pep Mask (Alternative)
If you are using a Pep Mask, follow these assembly instructions. The adaptor assembled in the previous steps will be added to the Pep Mask following the picture instructions.
Add the assembled adaptor to the Pep Mask
Step 4: Store Device
Flexible tube and USB-C cable can be stored wrapped around the recessed adaptor holder. Push adaptor firmly into place as shown on image. Puffin device will clip in next to this. If desired, the foam can be placed on top of adaptor and the card placed on top of this to prevent movement when closed.
Store components in case
Step 5: How to Hold the Device
The device can be held in one hand in portrait mode or rested on the table or other surface in landscape mode.

How to hold the device
Step 6: Download App and Initial Setup
- Download the Puffin Pal app from Google Play Store
- Create an account or log in with your existing credentials
- Turn on your Puffin device by pressing the power button (you'll see the Puffin logo appear)
- The app will guide you through connecting your device to WiFi (note: this process may vary by Android manufacturer)
- Follow the on-screen prompts to pair your device
- When the captive portal appears, tap "Save" to store your WiFi credentials on the device
- Return to the Puffin app to complete pairing
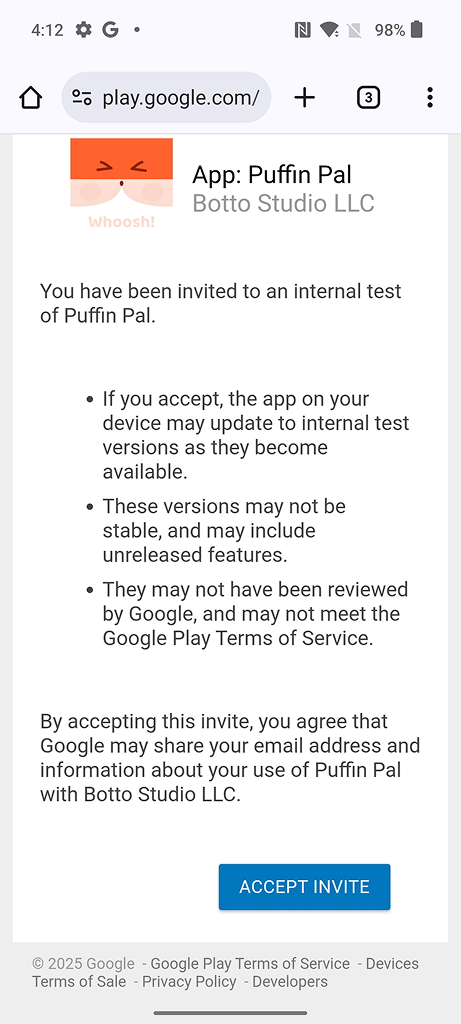
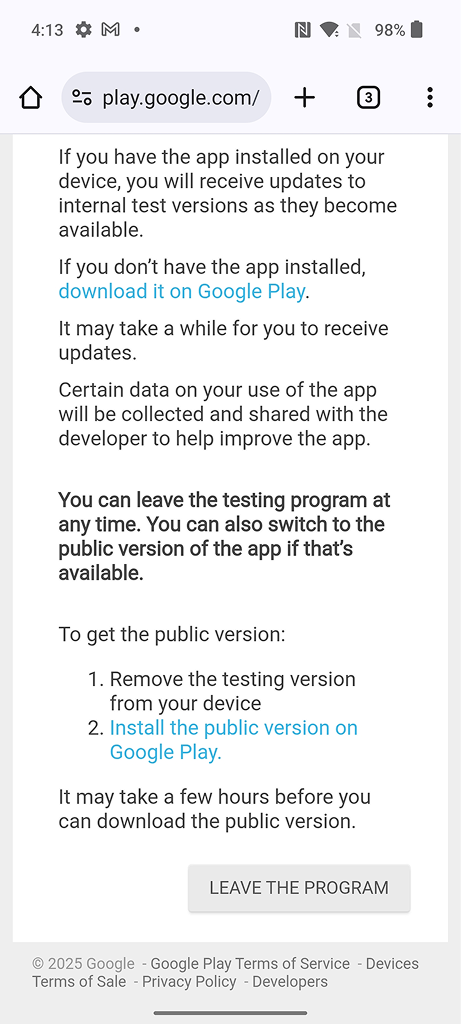
Join test program
Download from Play Store

Tap Install
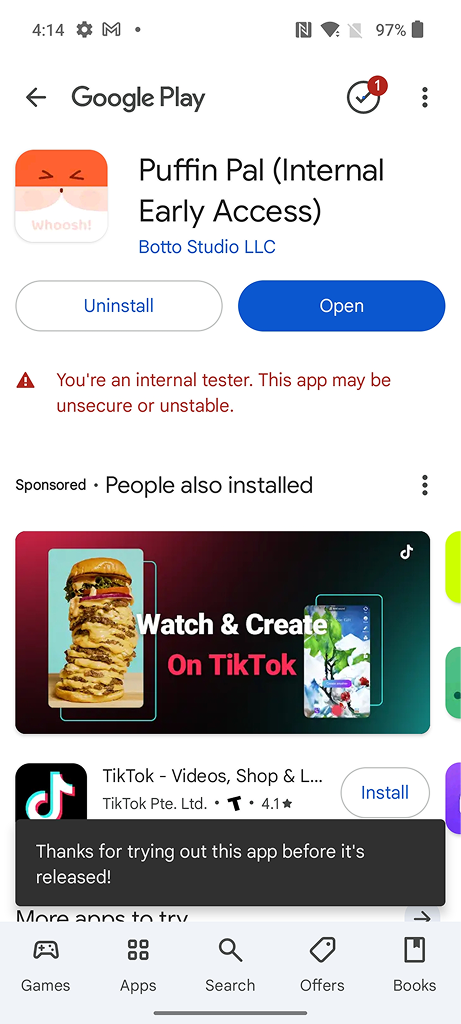
Open the app
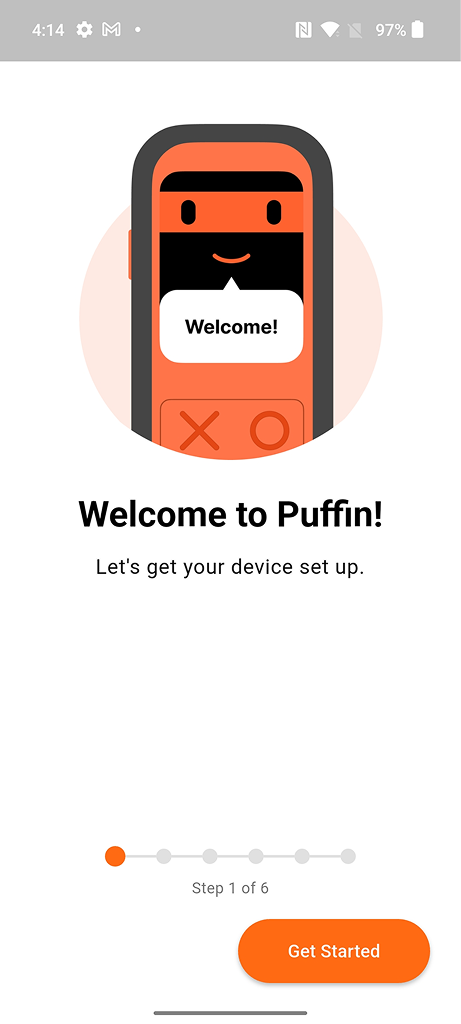
Tap Get Started
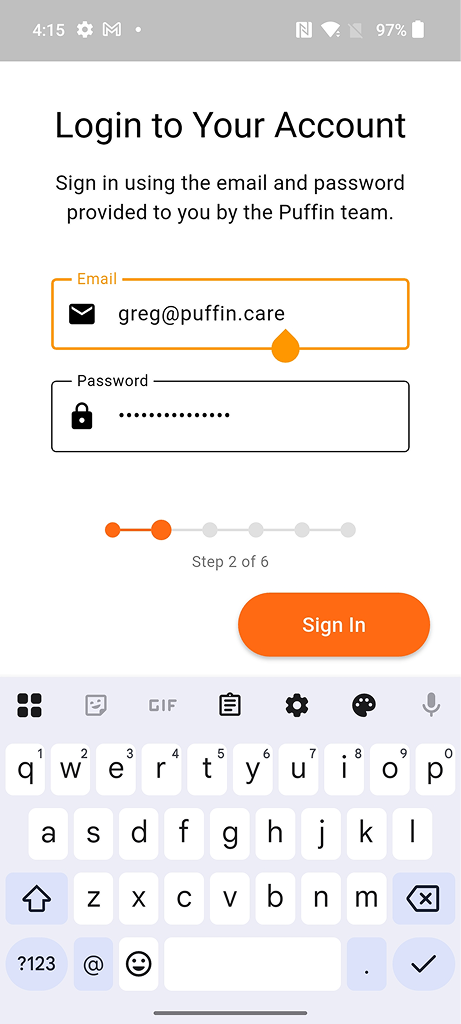
Login or create account
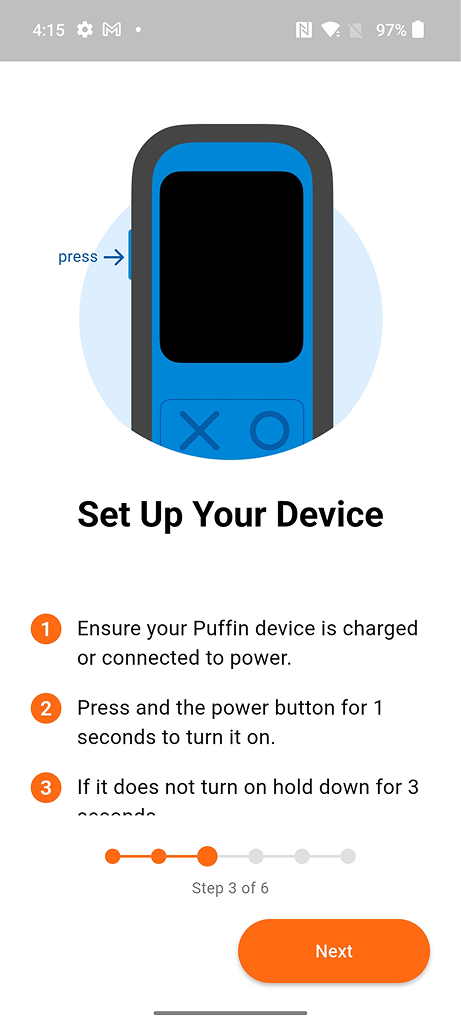
Turn on your device
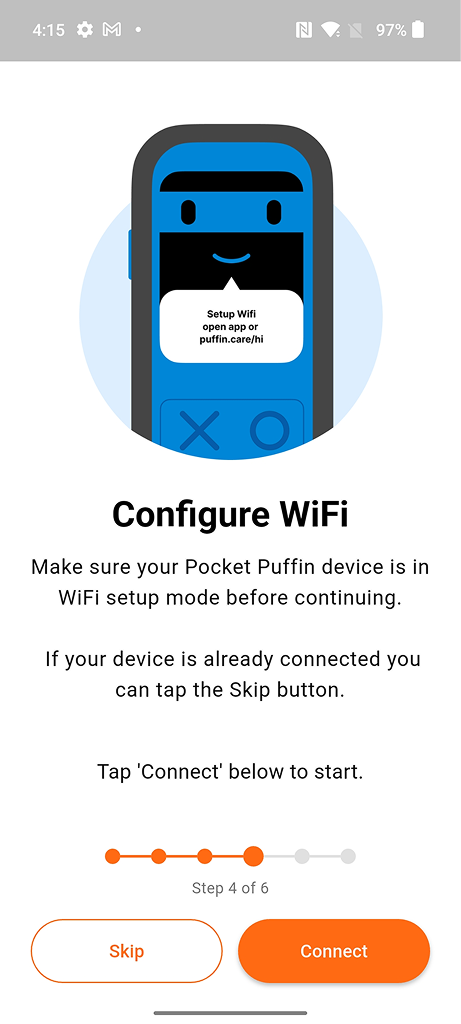
Start WiFi connection
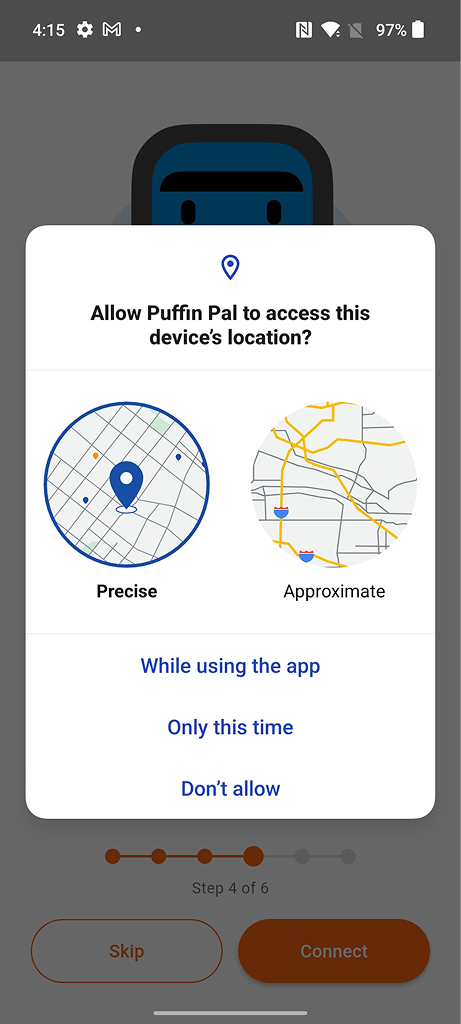
Allow location access
Open WiFi settings
Connect to Puffin WiFi

Tap Puffin network

Enter WiFi password
Tap Save
Switch back to Puffin app
Tap Next to continue

Pair with your device
Setup complete!

App home screen
Step 7: Adding Another Device
Add additional Puffin devices to your account.

Tap Add Device
Connect new device
Configure WiFi
Complete pairing
Step 8: Account Settings and Logout
Manage your account settings and logout process.
View prescription
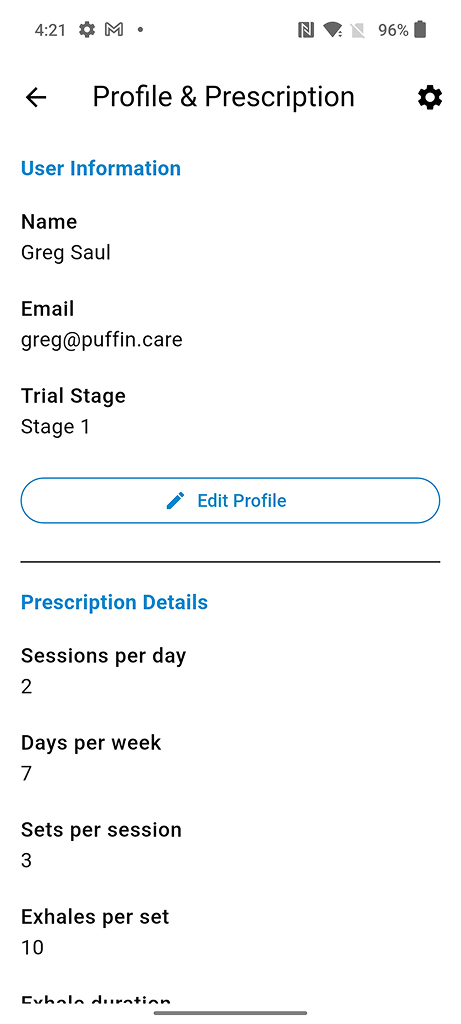
Edit profile
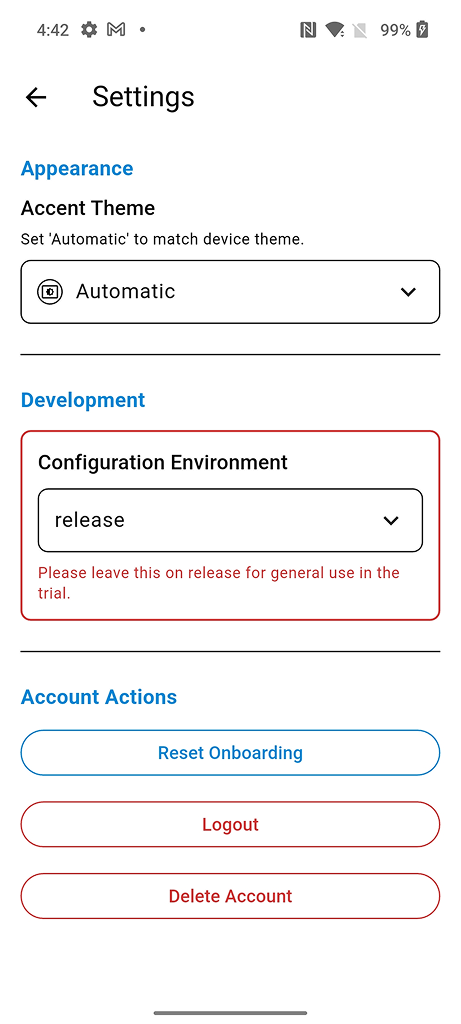
Tap Logout
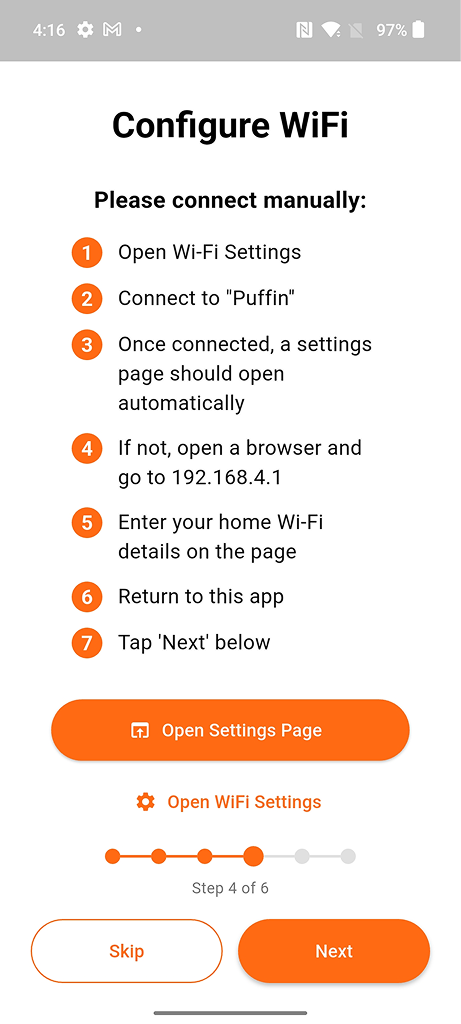
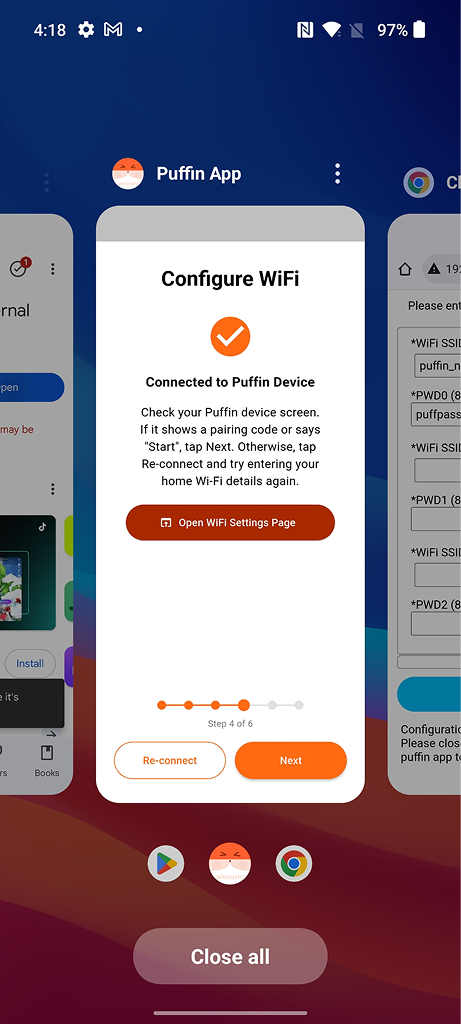
Step 9: Manual WiFi Setup (Alternative Method)
If automatic setup doesn't work, use manual WiFi configuration through Android settings.

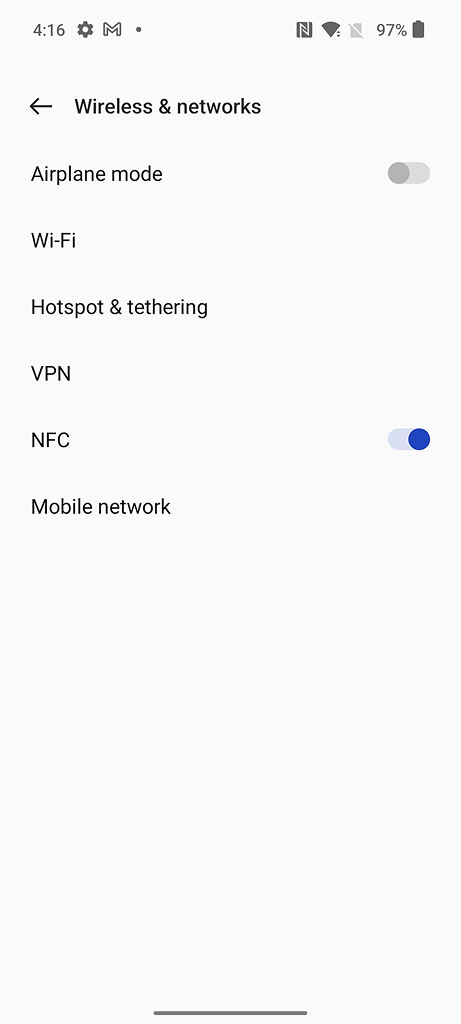
Open Android WiFi settings
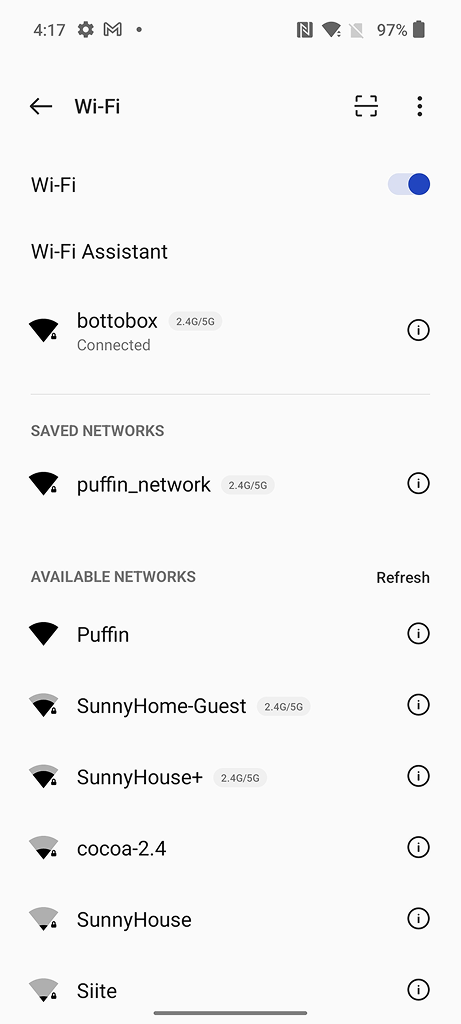
Tap Puffin network
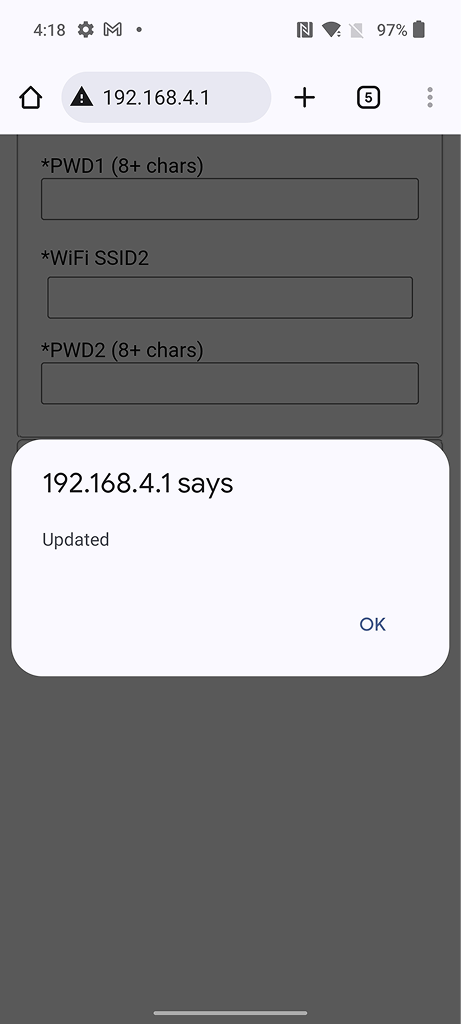
Enter WiFi credentials

Tap Save
Troubleshooting Android Issues
Common Android-specific issues and solutions:
- Device not appearing: Ensure Location is enabled (required for Bluetooth scanning)
- App stops in background: Disable battery optimization for Puffin Pal in Settings
- Connection issues on Samsung: Check if Puffin Pal is in the sleeping apps list and remove it
- Bluetooth keeps disconnecting: Enable "Unrestricted" battery usage for the app
- WiFi captive portal not appearing: Try using Chrome browser if default browser doesn't work